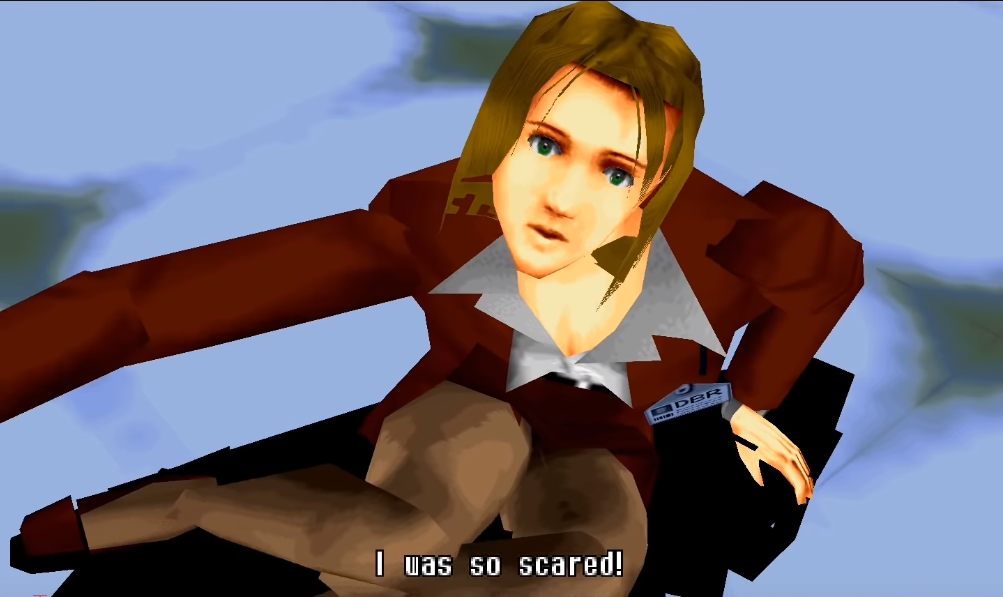
“Others are still inside. Help them.“
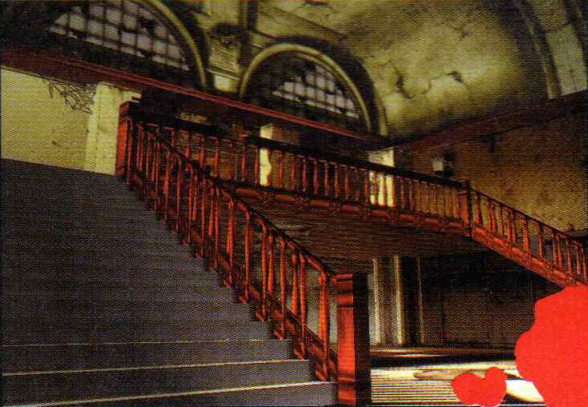
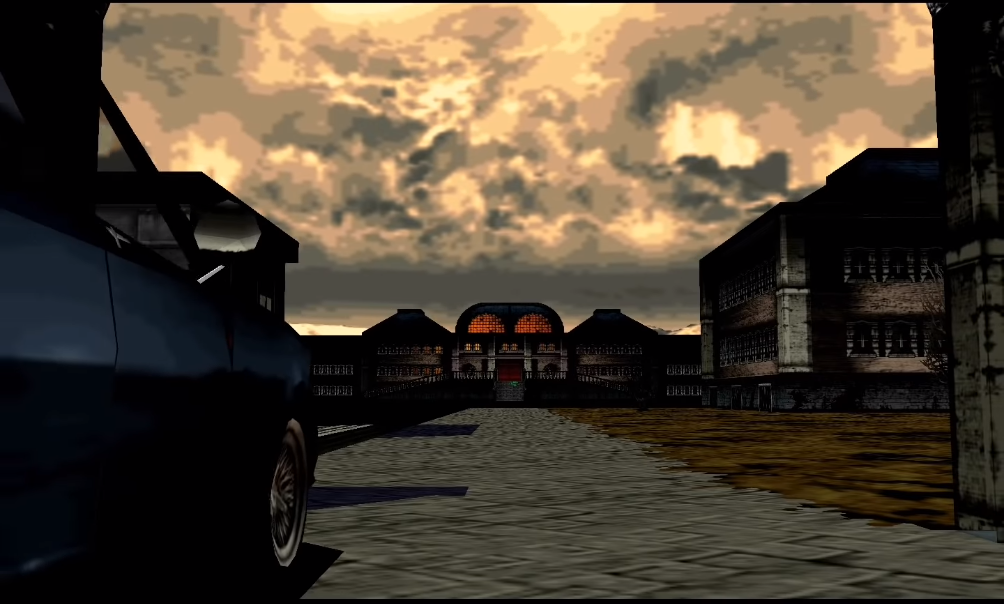
The first stage depicts everything from the agents arriving towards the mansion to the tragic reunion with Sophie, which is the highlight of the tragedy. It’s a deep area where there are a lot of branch routes and it is not possible to grasp the whole scene by playing once or twice.
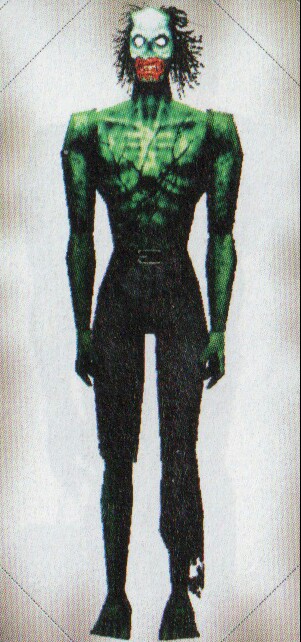
Creatures
Bourbon 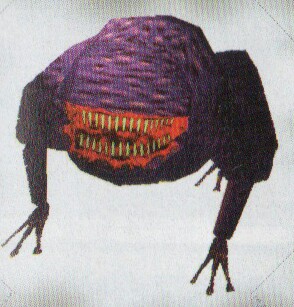
Bueel 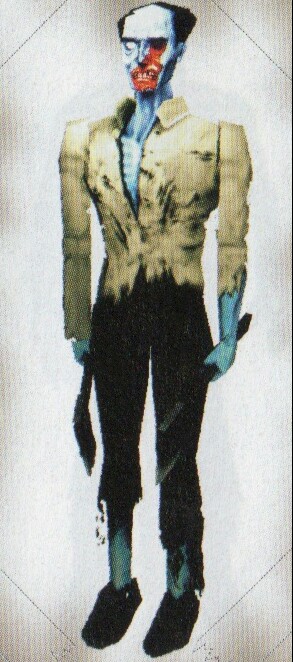
Cyril 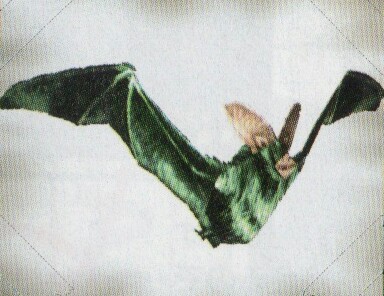
Devilon 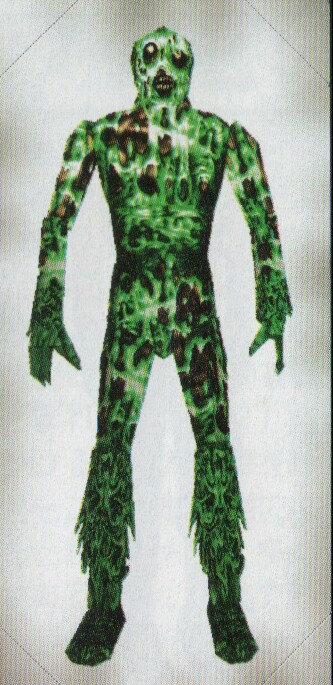
Ebitan-a 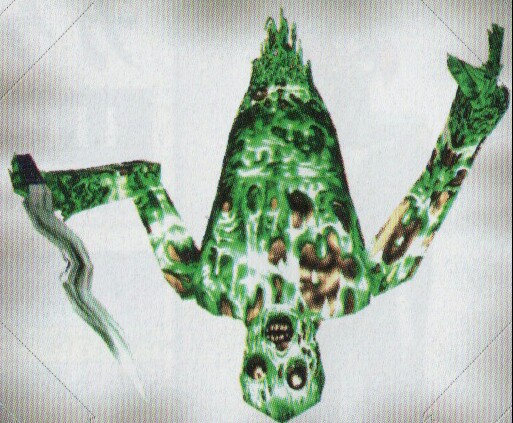
Ebitan-b 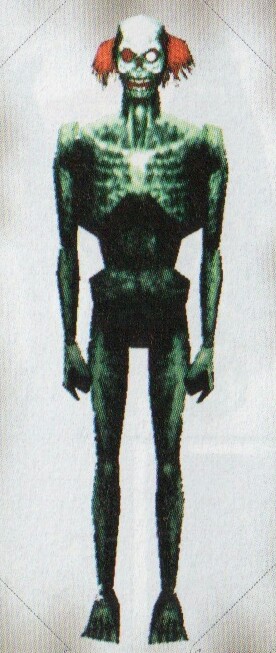
Kageo 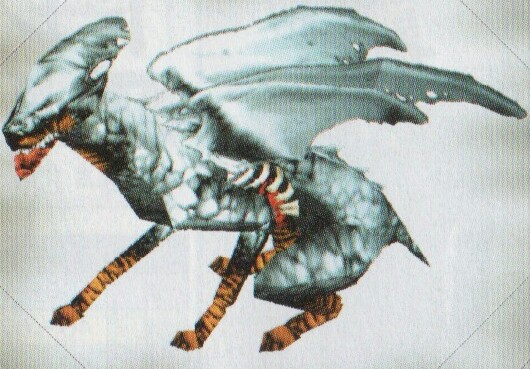
Kenfis 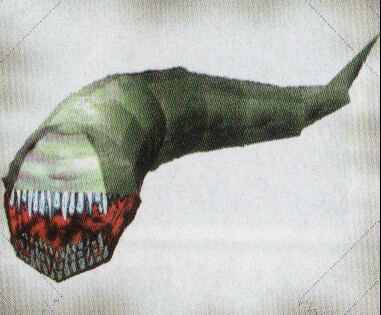
Murrer 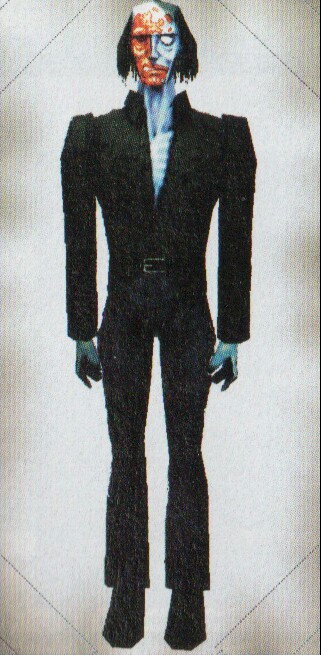
Nail 
Name 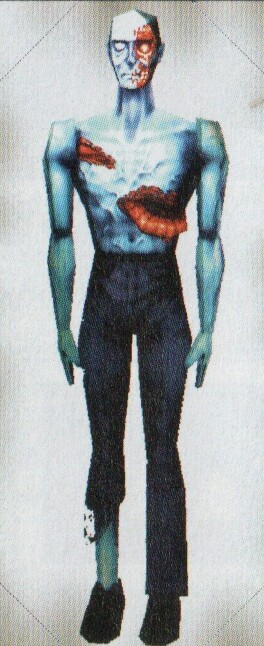
Sam 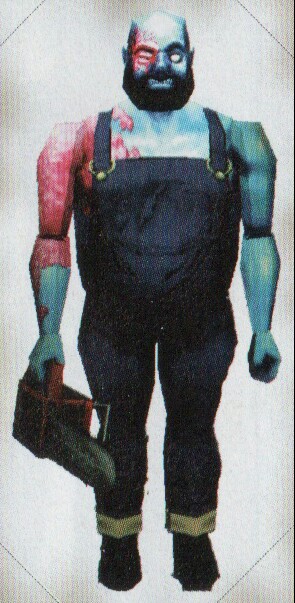
Samson 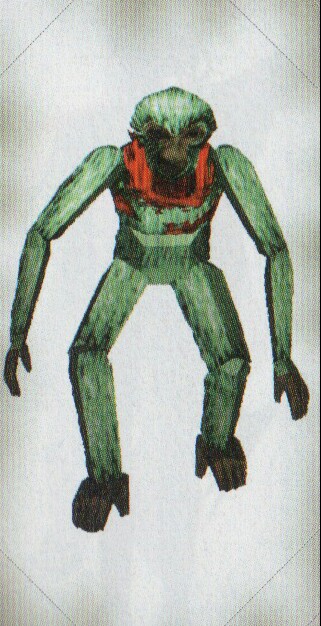
Saruzou 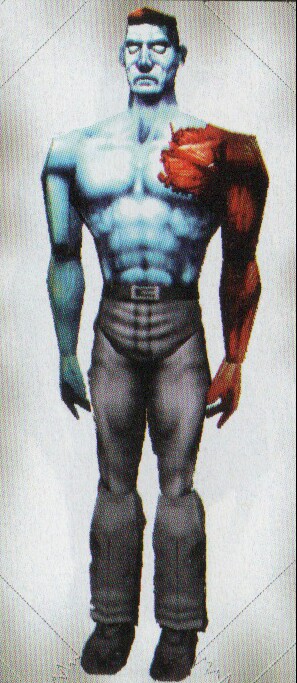
Simon
Boss: Chariot type 27
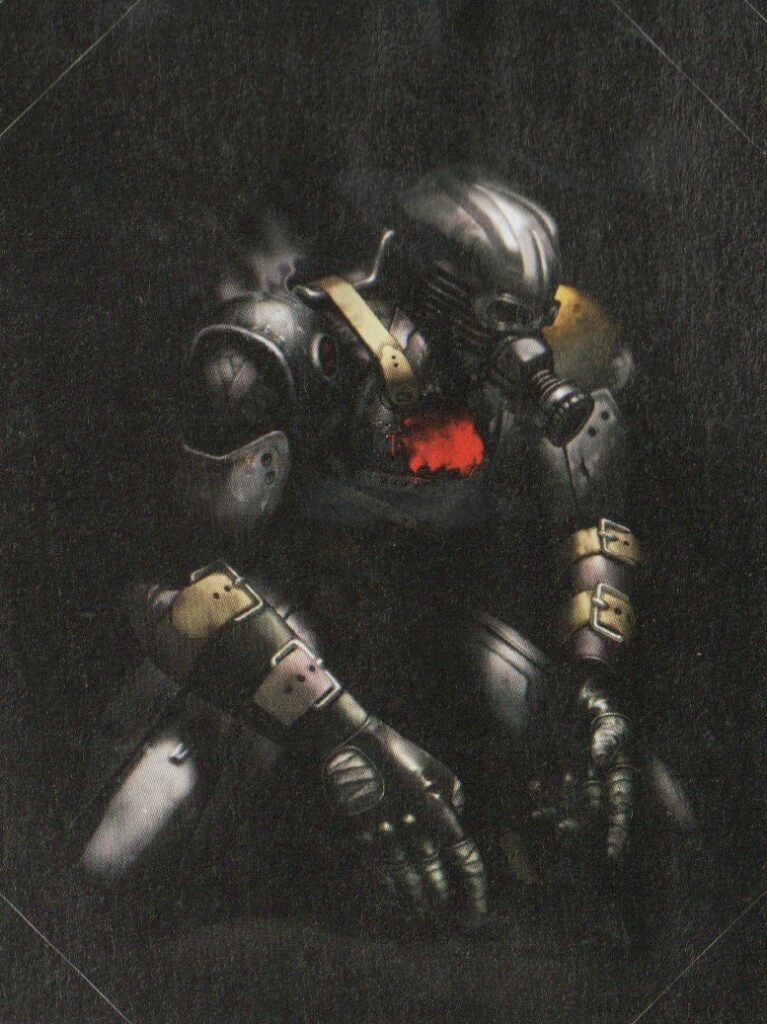
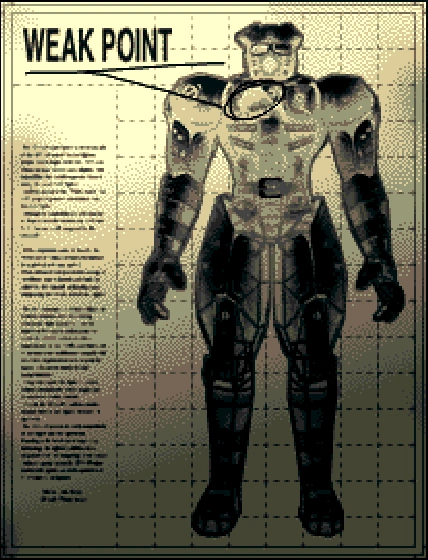
HP: 480 Weakness: Chest
Originally designed to act as Dr. Curien’s personal bodyguard, the creature know as Chariot is an unstoppable powerhouse. Chemically treated skin has been enhanced with high tensile steel, acting as an impenetrable armored shell. Chariot’s speed and strength are devastating when combined with his razor-sharp battle staff. It’s weak point is the damaged part of the armor on the right chest, which seems to have been the result of a fierce death battle by a previously infiltrated agent.
High Score Guide
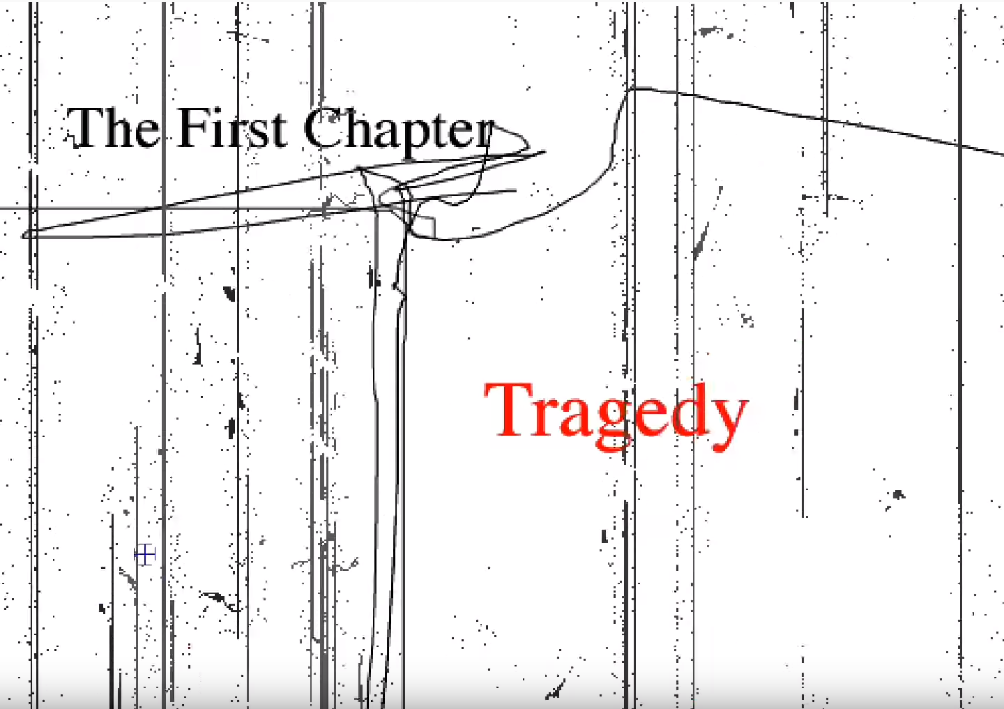
| Introduction | The First Chapter Tragedy |
The Second Chapter Revenge |
The Third Chapter Truth |
The Final Chapter The house of the dead |
Alternate High Scoring Paths |
Special Thanks |
|---|---|---|---|---|---|---|
| AIM | DESCRIPTION | |||||
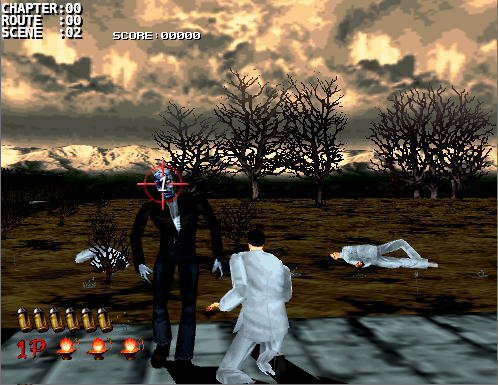 |
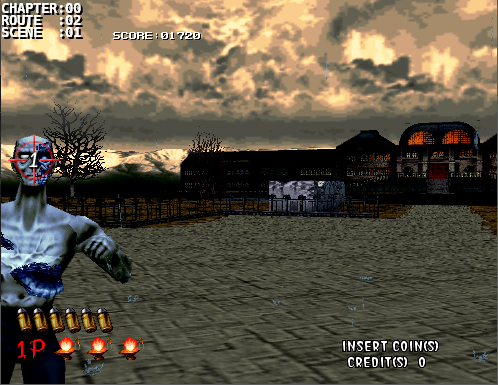
Scene: [00:00:02]
Difficulty: C
Number of Creatures: 1
Number of Headshots: 1/1
Scene Score:      200/  200
Running Score:  00200/00200
Bonus:

Notes:
Your first headshot.  If you can't get this one consistently then you'll need to work on your aim as it'll only get tougher from here on out.
|
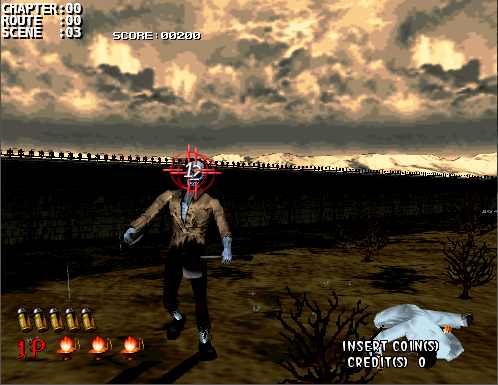 |
Scene: [00:00:03]
Difficulty: C
Number of Creatures: 1
Number of Headshots: 2/2
Scene Score:      320/  320
Running Score:  00520/00520
Bonus:

Notes:
Some creatures take more than one headshot.  Cyril usually takes two to take it down.
|
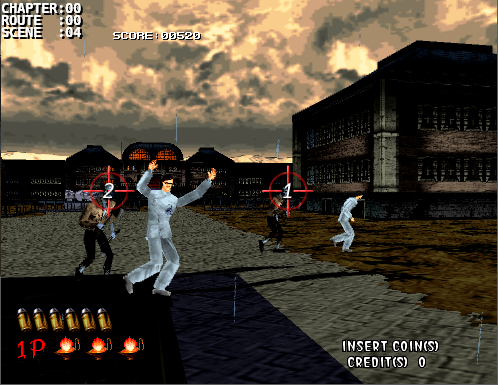 |
Scene: [00:00:04]
Difficulty: A
Number of Creatures: 2
Number of Headshots: 1/2
Scene Score:     1080/ 1200
Running Score:  01600/01720
Bonus: 400 x 2 (Researchers)

Notes:
Time to save those researchers.  This scene goes by really fast and getting those headshots takes precise timing and aim.  I typically shoot down the right one first and then the left but I've seen it done the other way as well.  Getting at least 1 headshot here is preferred.  An alternate strategy exists if the left reseacher is attacked which will be discussed at the end.
|
 |
Scene: [00:02:01]
Difficulty: C
Number of Creatures: 1
Number of Headshots: 1/1
Scene Score:      200/  200
Running Score:  01800/01920
Bonus:

Notes:
Aim towards the left of the side of the screen, just a bit off from the edge.
|
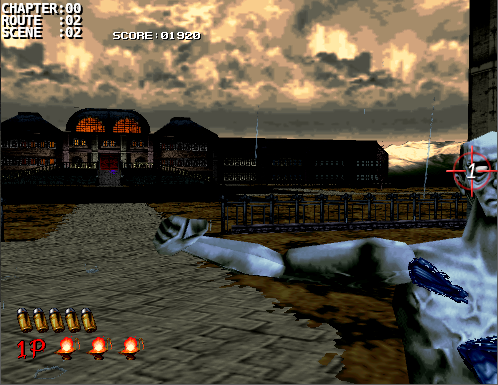 |
Scene: [00:02:02]
Difficulty: C
Number of Creatures: 1
Number of Headshots: 1/1
Scene Score:      200/  200
Running Score:  02000/02120
Bonus:

Notes:
This one comes from the very edge of the right of the screen.
|
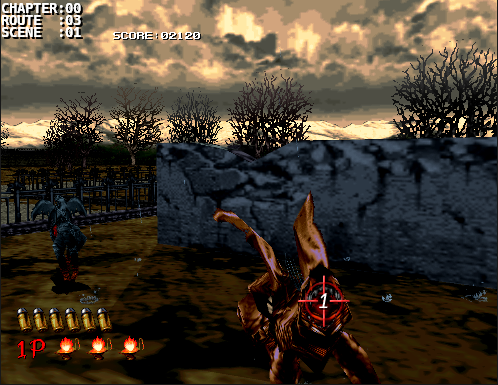 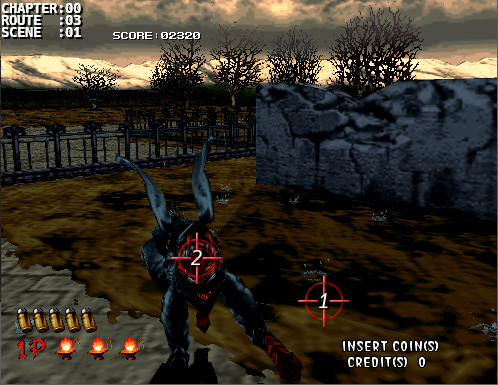 |
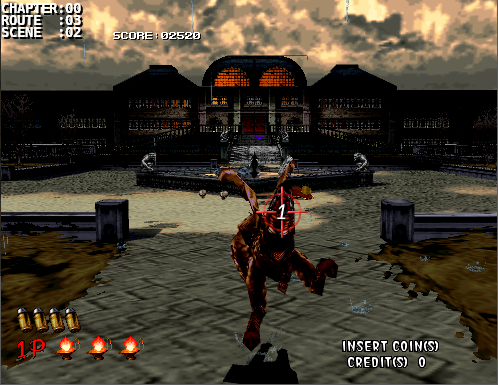
Scene: [00:03:01]
Difficulty: C
Number of Creatures: 2
Number of Headshots: 2/2
Scene Score:      400/  400
Running Score:  02400/02520
Bonus:

Notes:
The strat for this one is to let them run around until they decide to rush at you.  The red one will come at you first so shoot it in the mouth when it lunges at you.  The camera will then pan to the blue one.  Wait until it's done staggering and shoot that one in the mouth too.
|
 |
Scene: [00:03:02]
Difficulty: C
Number of Creatures: 1
Number of Headshots: 1/1
Scene Score:      200/  200
Running Score:  02600/02720
Bonus:

Notes:
Same idea as the last scene but it lunges at you almost immediately.  The aim for this is just slightly to the right of center.  If you shoot dead center then you'll most likely miss the headshot.
|
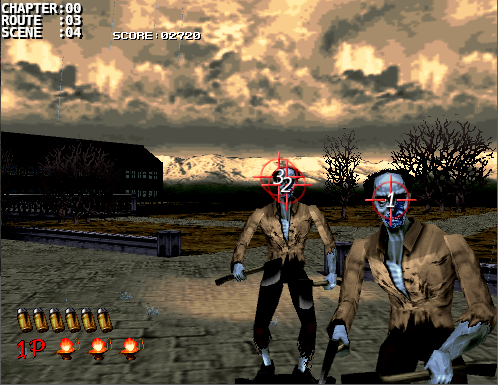 |
Scene: [00:03:04]
Difficulty: C
Number of Creatures: 2
Number of Headshots: 3/3
Scene Score:      520/  520
Running Score:  03120/03240
Bonus:

Notes:
After being horrified seeing Hangedman swoop down and taking Sophie away, the camera will pan to the right and 2 Cyrils will appear with the right one attacking first and quickly. A single shot will take it down while you'll need two for the next one.
|
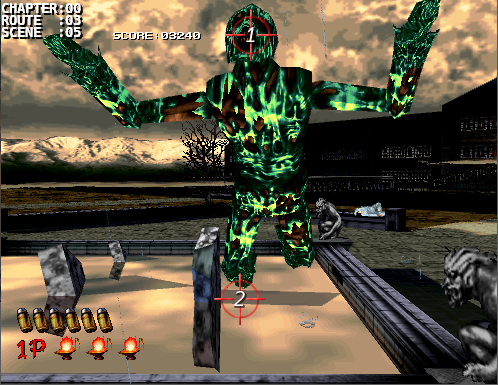 |
Scene: [00:03:05]
Difficulty: C
Number of Creatures: 1
Number of Headshots: 1/1
Scene Score:      200/  200
Running Score:  03320/03440
Bonus:

Notes:
An Ebitan will jump scare you from the fountain.  You can show off by tagging it while it's mid-air and watch it do a 720 face first back into the fountain [1] otherwise you can let it land and take your shot there [2].
|
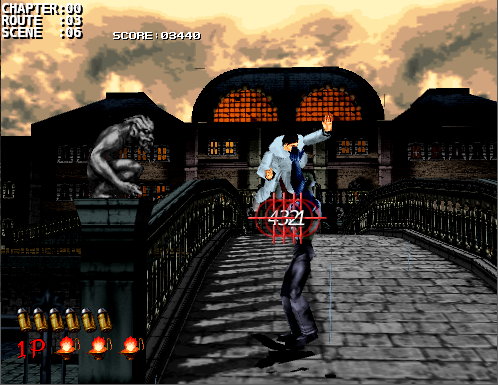 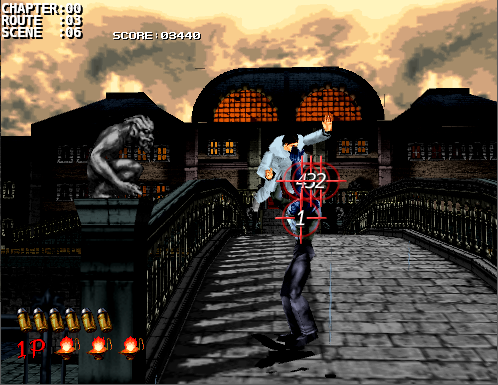 |
Scene: [00:03:06]
Difficulty: B / S
Number of Creatures: 1
Number of Headshots: 0/1
Scene Score:      480/  600
Running Score:  03800/04040
Bonus: 400 (Researcher)

Notes:
This part can be quite difficult if you don't know the correct approach.  In addition to that, it'll be much harder to reach 100K if you allow the researcher to be thrown off of the bridge as you will take a route with less scoring potential not to mention that you no longer have access to the bonus room at the end.

Easy approach:
4 shots to the chest. Simple.  Do not shoot at the arms because it will not reduce its HP fast enough and the researcher will get tossed over.


Headshot approach:
While it is possible to get 2 headshots, there is only about a 15-20 frame window with high precise shots and to do it in realtime is most nearly impossible as you run the risk of either shooting the researcher or not getting enough shots off to kill the creature.  The best approach is to shoot the chest once to reduce its HP then when takes a step forward with its left leg its head will then be visible behind its arms for a slight moment.  During this time you have a chance for three quick shots for the head.  If you don't manage to get the headshot then use the last two bullets to finish it off in the chest.
|
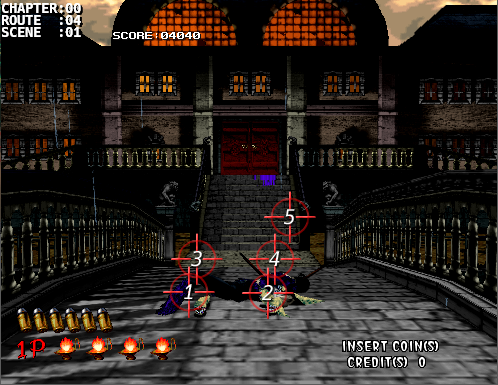 |
Scene: [00:04:01]
Difficulty: C
Number of Creatures: 5
Number of Headshots: 0/0
Scene Score:      400/  400
Running Score:  04200/04440
Bonus:

Notes:
Fairly simple, 5 creatures 5 bullets.  The first 4 murrers come in pairs with a bit of a pause between their attacks so don't try to shoot them all right away.  The last straggler will then come out alone to join the fun only rest in peace with its fellow companions.  No headshot bonus for these creatures.
|
 |
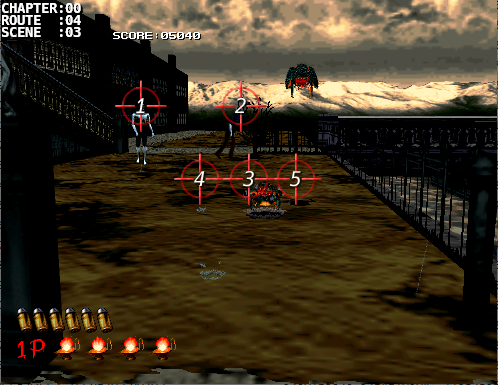
Scene: [00:04:02]
Difficulty: B
Number of Creatures: 3
Number of Headshots: 1/3
Scene Score:      360/  600
Running Score:  04560/05040
Bonus:

Notes:
You can also get headshot bonuses for creatures in the background.  Use 2 bullets each to attempt the headshots on the creatures above.  The camera will then pan a bit to the left to focus on the one at the bottom.  There will most likely be a hatchet flying at you at this point so shoot that down right away [5] and use your last bullet to get the single headshot.
|
 |
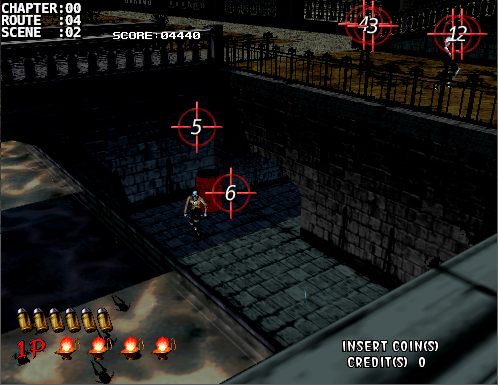
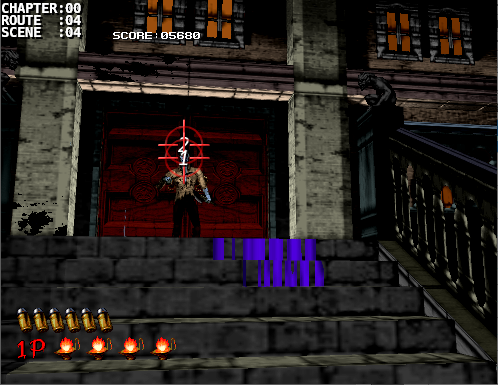
Scene: [00:04:03]
Difficulty: B
Number of Creatures: 5
Number of Headshots: 0/2
Scene Score:      400/  640
Running Score:  04960/05680
Bonus:

Notes:
Take your time to aim at the 2 creatures in the background.  Shortly after, the frogs will start to attack.  Middle, left then right.
|
 |
Scene: [00:04:04]
Difficulty: C
Number of Creatures: 1
Number of Headshots: 2/2
Scene Score:      320/  320
Running Score:  05280/06000
Bonus:

Notes:
This Cyril takes two shots.  I like to tag him while running up the stairs to save a bit of time.
|
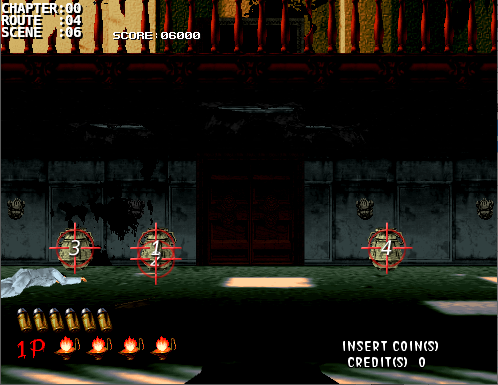  |
Scene: [00:04:06]
Difficulty: C
Number of Creatures: 1
Number of Headshots: 1/1
Scene Score:      400/  400
Running Score:  05680/06400
Bonus:

Notes:
Congratulations! You managed to infiltrate Curien's Mansion, time to start destroying stuff.

When you first enter you'll see 3 vases? pots? most likely expensive ones?  Curien hid a coin in one of them.  Try shooting the middle one first to see if it's there, if it is then grab the coin by shooting at it.  If it's not there then focus on destroying the other two and take note of which one it's in.

The camera will now pan up to the ceiling as there are 2 dark-haired Saruzou's on the chandelier.  They'll fall down as the chandelier shatters in front of you and rush you.  Shoot the left one as it gets closer to you, this will take you through the lower double door path.  Don't get distracted by the other one running away because you can't kill it, instead, use this time to grab the coin if you didn't get it earlier.
|
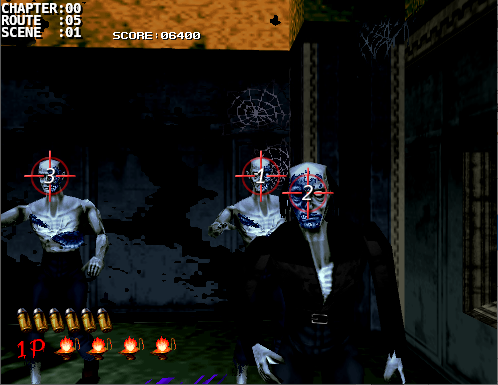 |
Scene: [00:05:01]
Difficulty: C
Number of Creatures: 3
Number of Headshots: 3/3
Scene Score:      600/  600
Running Score:  06280/07000
Bonus:

Notes:
3 simple headshots. I usually go for the back one first as the hitbox timing for this scene is weird.  There are times when you'll shoot the front right one first but it won't connect unless you wait a bit for the camera to stop.
|
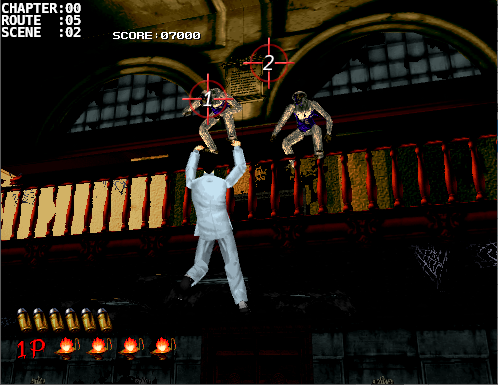 |
Scene: [00:05:02]
Difficulty: C
Number of Creatures: 2
Number of Headshots: 2/2
Scene Score:      800/  800
Running Score:  07080/07800
Bonus: 400 (Researcher)

Notes:
If you're playing as G then unfortunately this researcher will not give you bonus points for saving him (one of many scoring glitches in the game).  In any case, go ahead an save him by tagging the left light-haired Saruzou.  You can either tag the right one in the head mid-flight (if you're confident) or wait until it lands.  In either case you'll be aiming in the same place [2]
|
 |
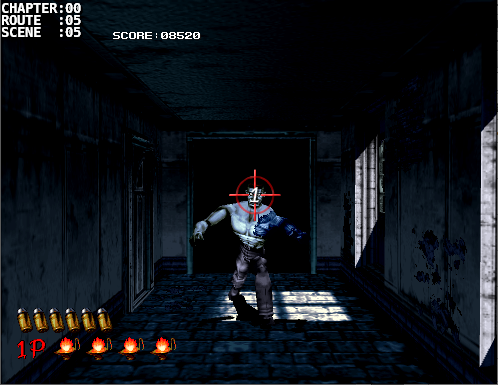
Scene: [00:05:03]
Difficulty: C
Number of Creatures: 1
Number of Headshots: 2/2
Scene Score:      320/  320
Running Score:  07400/08120
Bonus:

Notes:
As it starts to break through the door, aim above the hole and tag it twice as soon as it kicks the door down.
|
 |
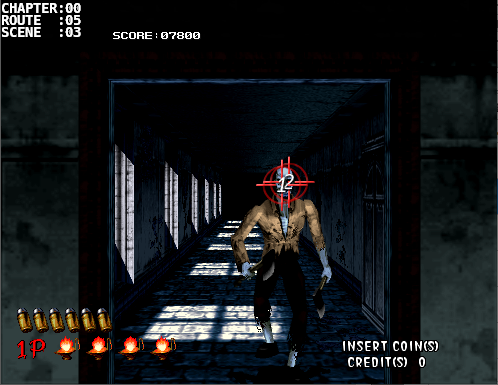
Scene: [00:05:05]
Difficulty: B
Number of Creatures: 2
Number of Headshots: 2/2
Scene Score:      400/  400
Running Score:  07800/08520
Bonus:

Notes:
As you rush in you'll notice that there's a hole in the floor.  There are a few rats that you can shoot if you want, no points though.  You'll then turn around and 2 Saruzou will come crashing in from the window to the right.  The best way to deal with a pair of creatures with random attack patterns like these is to shoot one once and allow the other to continue their movement so that their attacks are offset a bit and they won't attack you simultaneously from opposite directions.  You'll notice that I take this approach a lot in the later stages.  So shoot one just after it lands and take your best aim at their head as they jump around.  1 shot will back them off so take it one shot at a time to maximize your chances at a headshot.
|
 |
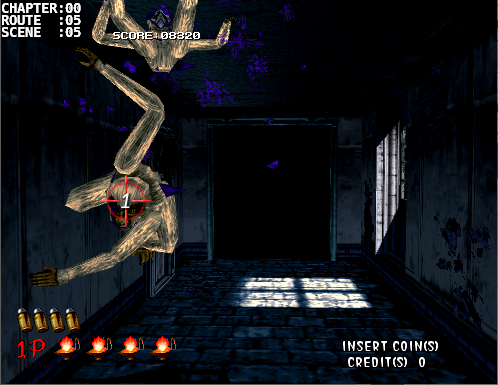
Scene: [00:05:05]
Difficulty: C
Number of Creatures: 1
Number of Headshots: 1/1
Scene Score:       20/   20
Running Score:  07820/08540
Bonus:

Notes:
This is the only scene where you'll take intentional damage.  You'll lose a life and 100 points but you'll access a route with the highest scoring potential.  But before you allow it to attack you, take one shot at its head to get an easy 120 points, just make sure you don't kill it.
|
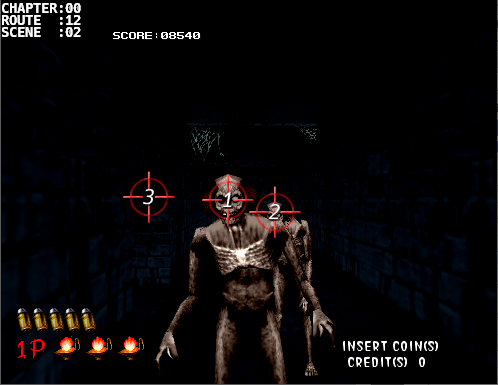 |
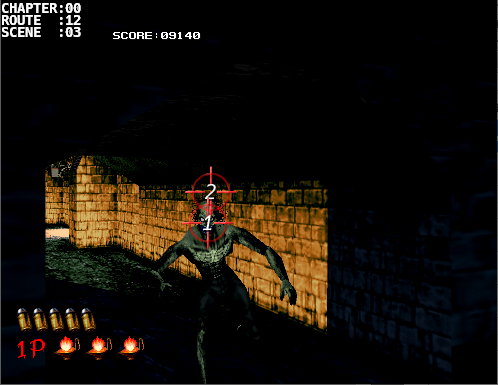
Scene: [00:12:02]
Difficulty: C
Number of Creatures: 3
Number of Headshots: 3/3
Scene Score:      600/  600
Running Score:  08420/09140
Bonus:

Notes:
Simple one-shotters.  After you take down the first two another one will emerge from the opening to the left.
|
 |
Scene: [00:12:03]
Difficulty: B
Number of Creatures: 1
Number of Headshots: 2/2
Scene Score:      320/  320
Running Score:  08740/09460
Bonus:

Notes:
This guy (Bourbon) can cause problems if you don't kill him fast enough.  It takes two headshots but unfortunately it will also go down if you tag it once in the head and then again anywhere else in the upper extremities thus missing an easy 120 points.
|
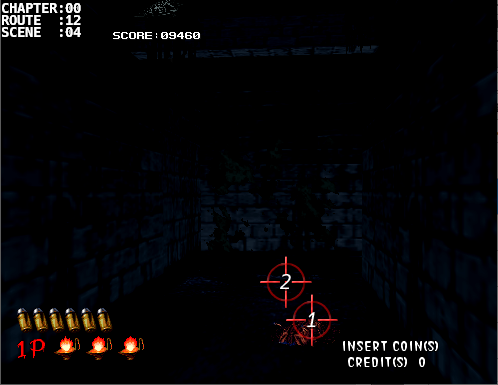 |
Scene: [00:12:04]
Difficulty: C
Number of Creatures: 2
Number of Headshots: 0/0
Scene Score:      160/  160
Running Score:  08900/09620
Bonus:

Notes:
Nothing fancy.  Just two little stragglers.
|
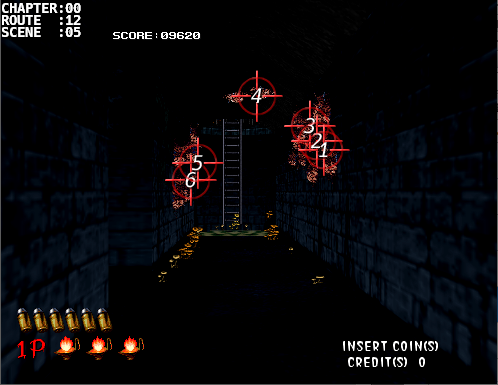 |
Scene: [00:12:05]
Difficulty: B
Number of Creatures: 6
Number of Headshots: 0/0
Scene Score:      480/  480
Running Score:  09380/10100
Bonus:

Notes:
6 creatures, 6 shots.  Left to Right or Right to Left.  Just remember that there are 3 on the right and 2 on the left.
|
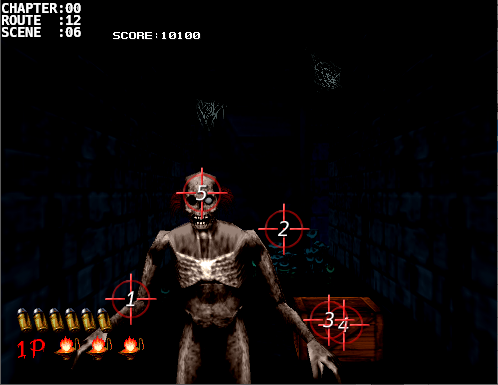 |
Scene: [00:12:06]
Difficulty: C
Number of Creatures: 1
Number of Headshots: 1/1
Scene Score: 200/ 200
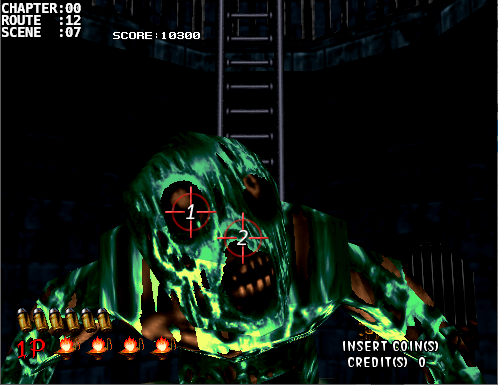
Running Score: 09580/10300
Bonus: Life Up
Notes:
There's a life up in the crate to the right but there's a Kageo that wants to attack you. There are times when it'll attack with a right hand slash (your left) or a double axe handle. My methodical approach is to:
1) Shoot off the Kageo's right arm as soon as your enter the scene.
2a) If it tries to attack with a right hand slash it won't connect because it's arm is gone.
2b) If it tries to double axe handle you then shoot off the left arm and the attack won't connect.
3) While the Kageo just stands there idling use this time to shoot the create and pick up the life up hidden within it.
4) Finish it off with a headshot.
If you're the type that just likes to rush through the scene then take the headshot first then empty your clip at the crate to pick up the life up before the camera moves on.
|
 |
Scene: [00:12:07]
Difficulty: C
Number of Creatures: 1
Number of Headshots: 2/2
Scene Score:      320/  320
Running Score:  09900/10620
Bonus:

Notes:
Another Ebitan will try to jump scare you from the murky waters.  Let it land and tag it with 2 headshots.
|
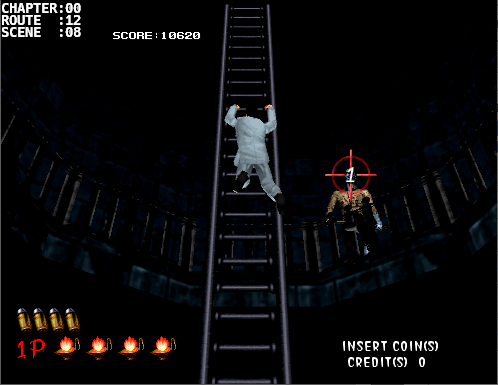 |
Scene: [00:12:08]
Difficulty: C
Number of Creatures: 1
Number of Headshots: 1/1
Scene Score:      600/  600
Running Score:  10500/11220
Bonus: 400 (Researcher)

Notes:
The camera will pan up and you'll see a researcher climbing up the ladder but more importantly there'll be a Cyril to the right of him that'll throw a hatchet at you if you're not quick enough.  One shot to the head will send it over the railing.  If you miss though you run the risk of trying to shoot down the hatchet while it flies inline between you and the researcher.
|
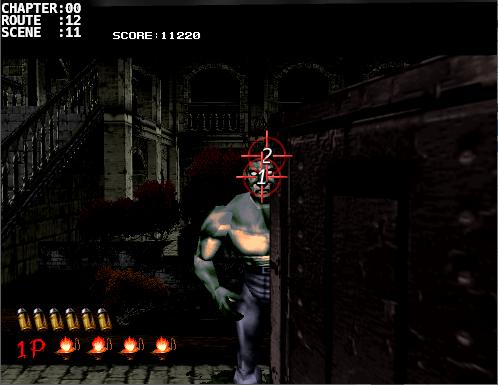 |
Scene: [00:12:11]
Difficulty: C
Number of Creatures: 1
Number of Headshots: 2/2
Scene Score:      320/  320
Running Score:  10820/11540
Bonus:

Notes:
After the cutscene climbing up the ladder, a steel door will open.  Fire off a shot just as it opens then wait a bit to let it recover after being blasted in the face then blast it again with one more shot.
|
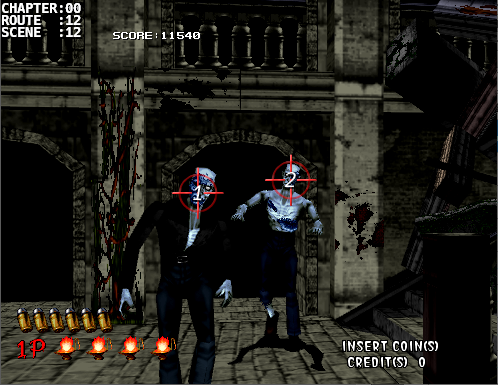 |
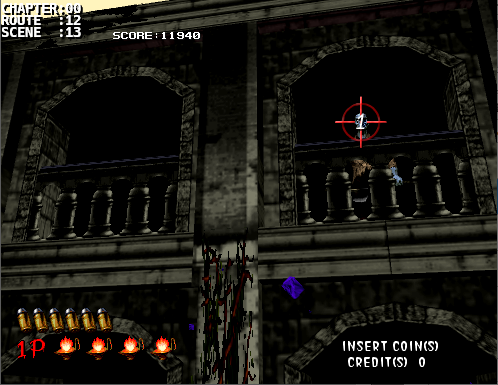
Scene: [00:12:12]
Difficulty: C
Number of Creatures: 2
Number of Headshots: 2/2
Scene Score:      400/  400
Running Score:  11220/11940
Bonus:

Notes:
2 easy shots.  It might as well be free.
|
 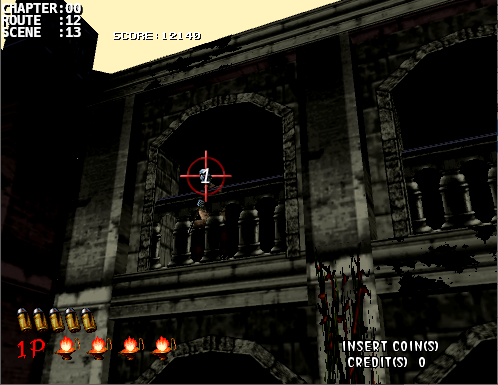 |
Scene: [00:12:13]
Difficulty: C
Number of Creatures: 2
Number of Headshots: 2/2
Scene Score:      400/  400
Running Score:  11620/12340
Bonus:

Notes:
This can get a bit out of hand if you don't tag the first one because it'll start throwing hatchets and you'll be too occupied to notice the next one to the left that'll start throwing hatchets too.  So get the first one and then the second one when the camera pans to the left.
|
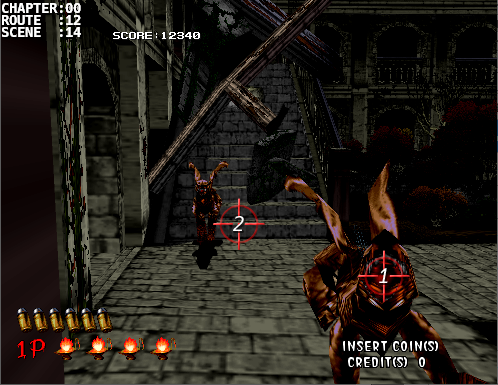 |
Scene: [00:12:14]
Difficulty: C
Number of Creatures: 2
Number of Headshots: 2/2
Scene Score:      400/  400
Running Score:  12020/12740
Bonus:

Notes:
Same old Kenfis strat.  Wait until it lunges at you and shoot it in the mouth.  First one is to the right and then the second will be in the middle.
|
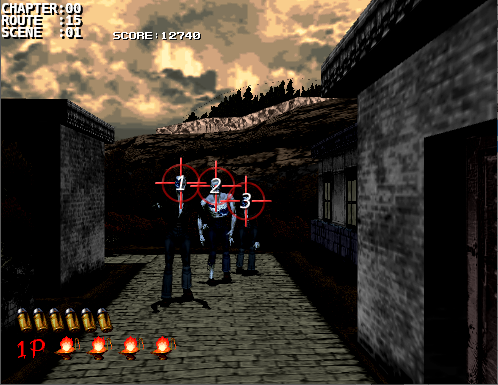 |
Scene: [00:15:01]
Difficulty: C
Number of Creatures: 3
Number of Headshots: 3/3
Scene Score:      600/  600
Running Score:  12620/13340
Bonus:

Notes:
3 more "free" shots.  Sometimes these creatures will be hunched over during this sequence so aim a bit lower than normal if that is the case.
|
 |
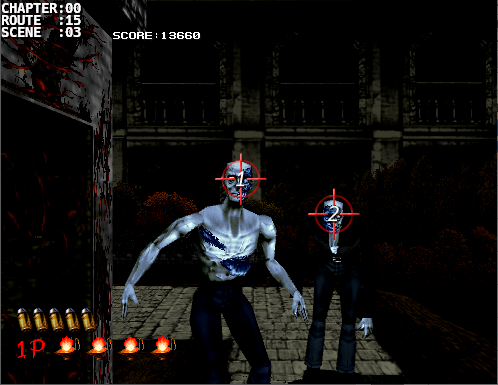
Scene: [00:15:02]
Difficulty: C
Number of Creatures: 1
Number of Headshots: 2/2
Scene Score:      320/  320
Running Score:  12940/13660
Bonus:

Notes:
You can move through this scene quickly if you tag this Cyril twice while on the move.  The camera won't even stop if you managed to do so.
|
 |
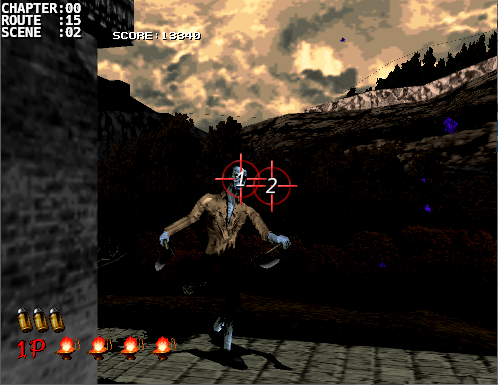
Scene: [00:15:03]
Difficulty: C
Number of Creatures: 2
Number of Headshots: 2/2
Scene Score:      400/  400
Running Score:  13340/14060
Bonus:

Notes:
2 more freebies.
|
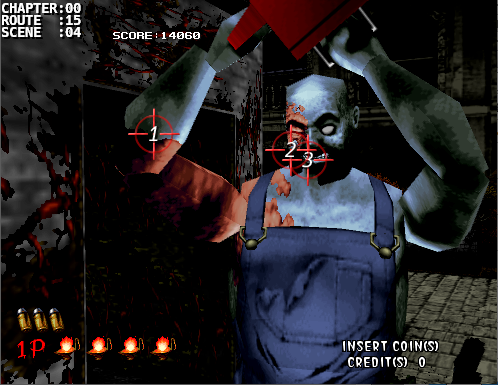 |
Scene: [00:15:04]
Difficulty: C
Number of Creatures: 1
Number of Headshots: 2/2
Scene Score:      320/  320
Running Score:  13660/14380
Bonus:

Notes:
First encounter with Samson.  It might look intimidating at first but the strat is really easy.  As it pulls its arms up to attack shoot its right arm (your left) and its attack will miss because its arm is gone.  Take your two shots and move on.  This will be the basic strat for most of the Samsons (rAHH right Arm, Head, Head).
|
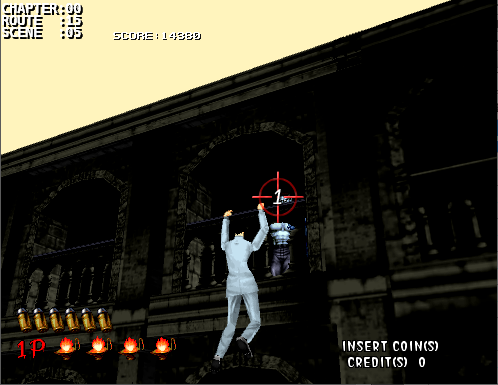 |
Scene: [00:15:05]
Difficulty: A
Number of Creatures: 1
Number of Headshots: 1/1
Scene Score:      600/  600
Running Score:  14260/14980
Bonus: 400 (Researcher)

Notes:
This is tough if your aim isn't precise.  As the researcher is hanging off of the ledge a Simon will approacher her.  You need to tag it just as it becomes visible from behind the archway.
|
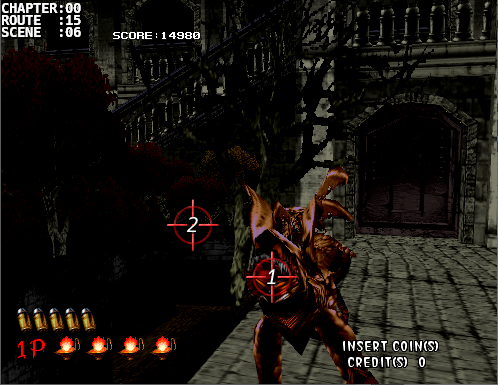 |
Scene: [00:15:06]
Difficulty: C
Number of Creatures: 2
Number of Headshots: 2/2
Scene Score:      400/  400
Running Score:  14660/15380
Bonus:

Notes:
Same Kenfis routine.  Just note the crosshair locations.  The first one will be at [1] while the second one could lunge at either [1] or [2].
|
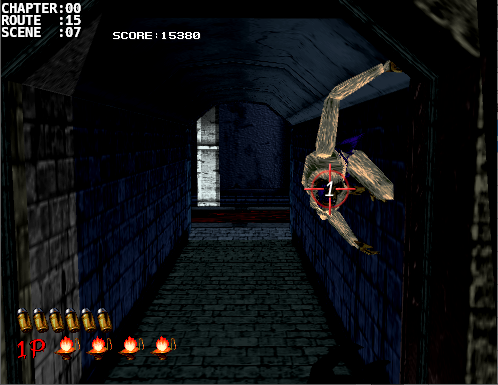 |
Scene: [00:15:07]
Difficulty: B
Number of Creatures: 1
Number of Headshots: 1/1
Scene Score:      200/  200
Running Score:  14860/15580
Bonus:

Notes:
A light-haired Saruzou will be awaiting behind the next door and may lunge at you right away.  My approach is to aim to the right side of the entry door and expect that it will lunge at you from there.  If you happen to notice it come from the left then quickly shift your aim and shoot it.  Sometimes, though, it'll just be standing there in the middle of the entryway.
|
 |
Scene: [00:18:01]
Difficulty: C
Number of Creatures: 1
Number of Headshots: 2/2
Scene Score:      320/  320
Running Score:  15180/15900
Bonus:

Notes:
Approach this Cyril like you would Samson.  Take note that it might attack with either its left or right hand.
|
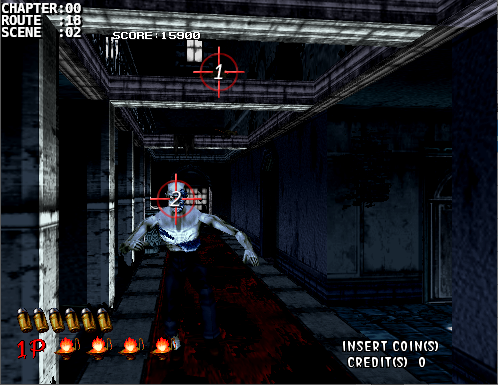 |
Scene: [00:18:02]
Difficulty: C
Number of Creatures: 1
Number of Headshots: 1/1
Scene Score:      200/  200
Running Score:  15380/16100
Bonus:

Notes:
Shoot the rat because, why not? (Totally optional) The next creature will come from the left.  Easy headshot.
|
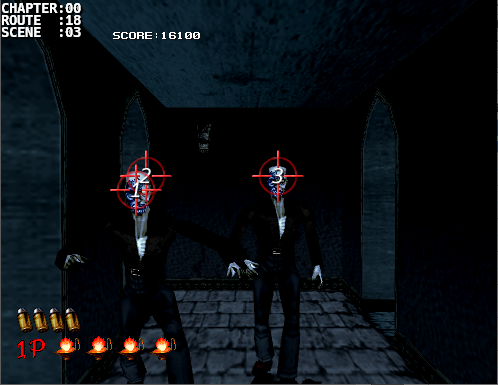 |
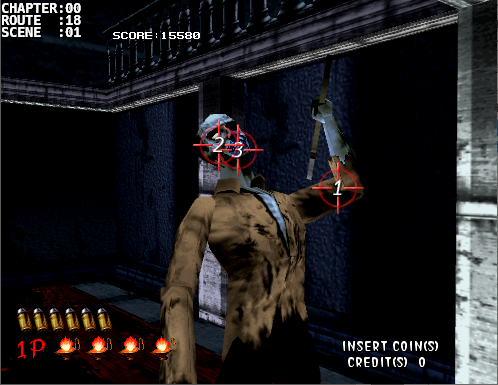
Scene: [00:18:03]
Difficulty: C
Number of Creatures: 2
Number of Headshots: 3/3
Scene Score:      520/  520
Running Score:  15900/16620
Bonus:

Notes:
This scene goes quick.  The creature from the right takes a single shot while the left one takes 2.
|
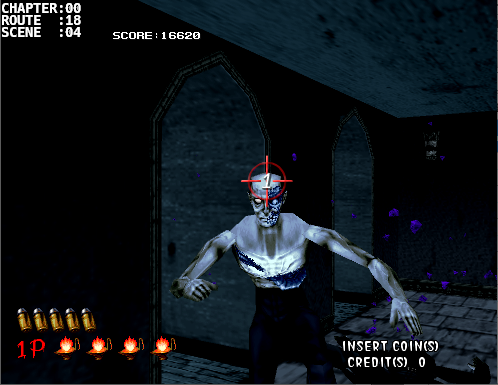 |
Scene: [00:18:04]
Difficulty: C
Number of Creatures: 1
Number of Headshots: 1/1
Scene Score:      200/  200
Running Score:  16100/16820
Bonus:

Notes:
Another one will come from the hallway to the left.  A single headshot will take it down.
|
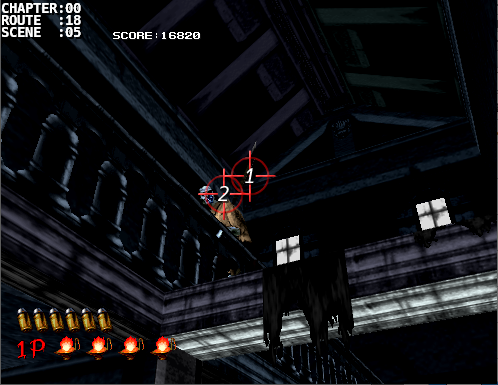 |
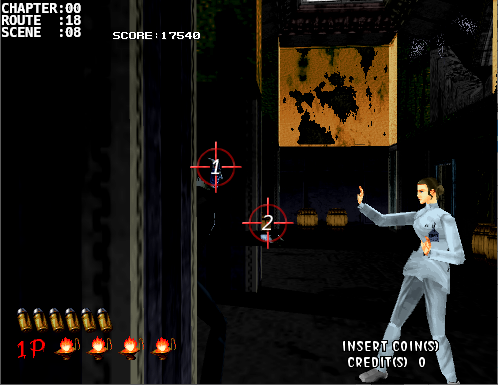
Scene: [00:18:05]
Difficulty: C
Number of Creatures: 1
Number of Headshots: 1/1
Scene Score:      200/  200
Running Score:  16300/17020
Bonus:

Notes:
When the camera pans up the Cyril will throw a hatchet directly at you.  Take note of which hand it uses and shoot down the hatchet first then go for the headshot.
|
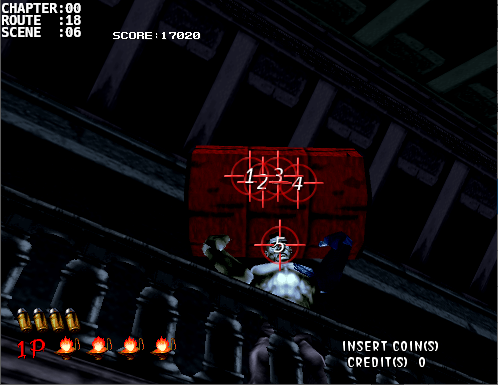 |
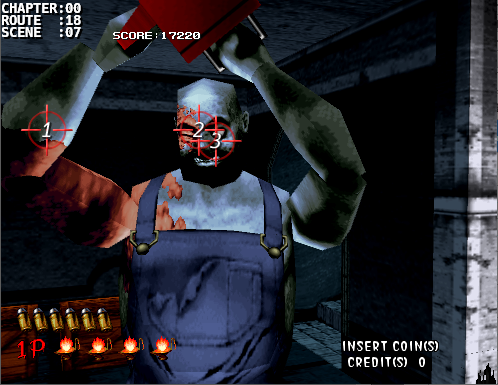
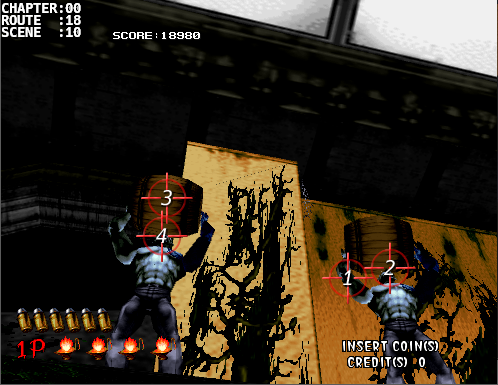
Scene: [00:18:06]
Difficulty: C
Number of Creatures: 1
Number of Headshots: 1/1
Scene Score:      200/  200
Running Score:  16500/17220
Bonus:

Notes:
I like to shoot down the oil drum first (which takes 4 shots) then go for the headshot.  If you're the impatient type then you can go for the headshot straight away.
|
 |
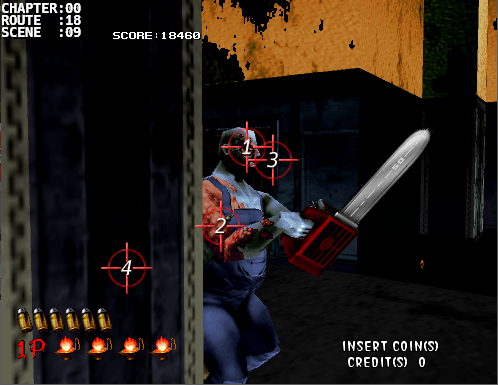
Scene: [00:18:07]
Difficulty: C
Number of Creatures: 1
Number of Headshots: 2/2
Scene Score:      320/  320
Running Score:  16820/17540
Bonus:

Notes:
Samson. rAHH
|
 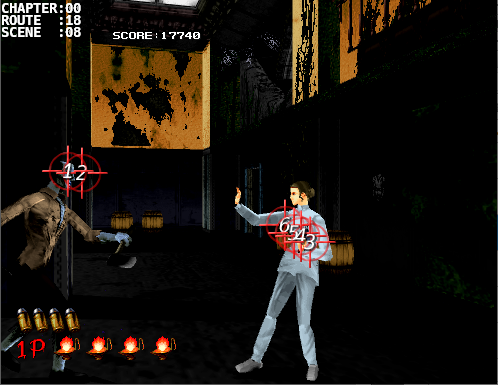 |
Scene: [00:18:08]
Difficulty: C
Number of Creatures: 2
Number of Headshots: 3/3
Scene Score:      920/  920
Running Score:  17740/18460
Bonus: 400 (Researcher) +
       Life Up

Notes:
A few things need to happen in this scene.  The first take down the creature that appears behind the column to the left.  Next shoot the wood barrel behind the far column as Dr Curien decided to hide another coin in here (or you can do it vice-versa).  You won't be able to get it yet but shooting down the barrel now will give you a clear shot later.


The screen will then pan to the right and another creature will appear to the left.  This one will take 2 shots.  When the reseacher comes up to you and "gives you something" start shooting at her, I mean the wooden barrels behind her to uncover another life up.  Actually, I wouldn't bother with this life up unless I'm under 3 lives because it doesn't benefit me score wise and will be at max lives starting the second chapter anyway.
|
 |
Scene: [00:18:09]
Difficulty: C
Number of Creatures: 1
Number of Headshots: 2/2
Scene Score:      520/  520
Running Score:  18260/18980
Bonus:

Notes:
Samson but a different approach.  Headshot, pause, right arm, pause, headshot (HrAH).  After you defeat Samson the coin that we uncovered should be in plain sight so grab your 200 points and move on.
|
 |
Scene: [00:18:10]
Difficulty: S/C
Number of Creatures: 2
Number of Headshots: 0/2
Scene Score:        0/  400
Running Score:  18260/19380
Bonus:

Notes:
This scene actually isn't that difficult, the difficult task is snagging both headshot points as the scene will move on whether or not you defeat these guys and will not reward you any points if you take too long, hence the S difficulty.  The scene itself only deserves a C rating if you're not going for the headshots.

The best approach is to shoot the right arm of the right Simon, then tag him with a headshot.  Next shoot down the wooden barrel that is probably flying at you from the one on the left, then tag him quickly before the scene moves on.  If done correctly you should be awarded points for both of them.

Many thanks to ConversusVans for this strat.
|
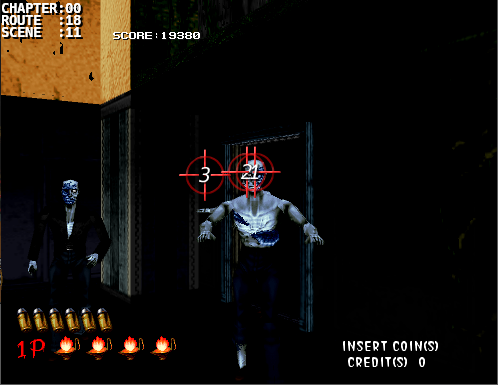 |
Scene: [00:18:11]
Difficulty: C
Number of Creatures: 3
Number of Headshots: 3/3
Scene Score:      600/  600
Running Score:  18860/19980
Bonus:

Notes:
3 more freebies.  If you take two shots at front middle one you can tag the one directly behind it in one go.  Then wait for the camera to pan to the 3rd one and get your easy points.
|
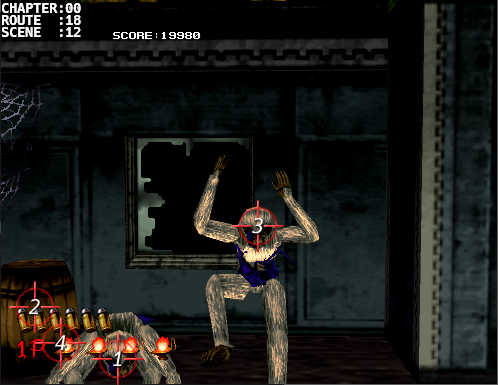 |
Scene: [00:18:12]
Difficulty: C
Number of Creatures: 2
Number of Headshots: 2/2
Scene Score:      600/  600
Running Score:  19460/20580
Bonus:

Notes:
There's a coin the wooden barrel to the left but a pair of light-haired Saruzou will jump through the window pane. Shoot the left one once to offset their attack pattern then shoot the wood barrel.  Now the one to the right will most likely be in the air and in your face.  Take it down and then the other once to the left (if you didn't get the headshot on the first shot) and grab Dr. Curien's hidden coin once again.
|
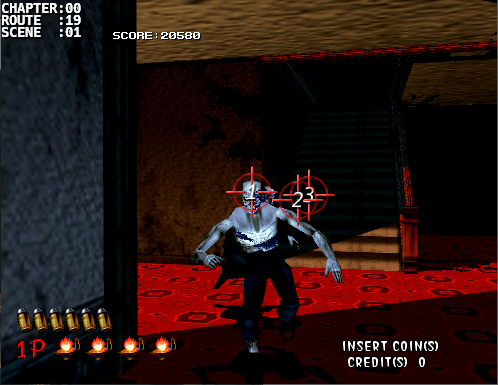 |
Scene: [00:19:01]
Difficulty: C
Number of Creatures: 2
Number of Headshots: 3/3
Scene Score:      520/  520
Running Score:  19980/21100
Bonus:

Notes:
Fairly easy.  The first one takes 1 and the second one takes 2.
|
 |
Scene: [00:19:03]
Difficulty: B
Number of Creatures: 1
Number of Headshots: 0
Scene Score:
Running Score:
Bonus:
Notes:
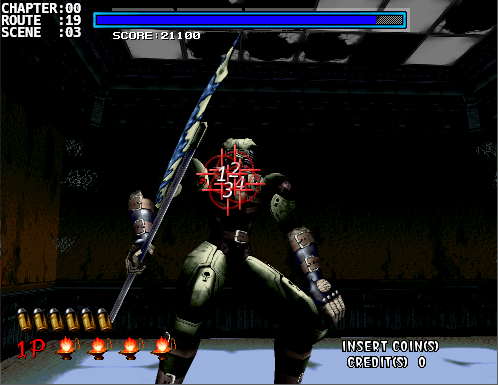
Time to work on that aim and timing; 13 bullets is all you really need if you want to show off. Chariot's first phase takes 4 shots to his weak point. If you time it right you can always get a clear shot off before it starts swinging its bardiche again.
|
 |
Scene: [00:19:03]
Difficulty: B
Number of Creatures: 1
Number of Headshots: 0
Scene Score:
Running Score:
Bonus:
Notes:
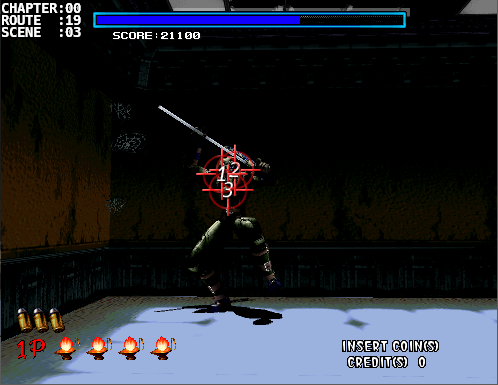
Chariot's second phase is no different than the first phase with the exception that it only takes 3 shots to his weak point.
|
 |
Scene: [00:19:03]
Difficulty: C
Number of Creatures: 1
Number of Headshots: 0/0
Scene Score: 1500/ 1500
Running Score: 21480/22600
Bonus: 1500 (Defeating Chariot)
Notes:
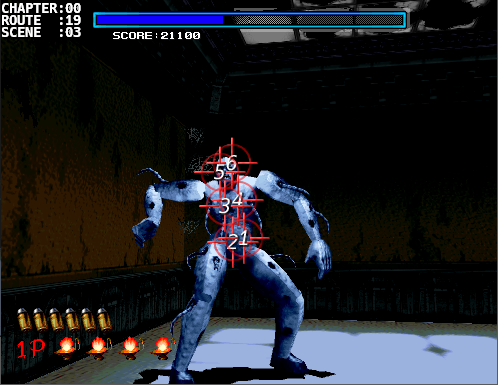
In this last phase it should only take 6 bullets to take it down. Take the first two shots at the abdomen (as this is the hardest area to shoot at while it's moving) then two to the chest and finally two in the head. Take your time in between shots otherwise it won't connect especially if you manage to get a critical shot. If you happen to shoot any other limb then it'll take more than 6 shots to defeat it.
|
 |
Scene:
Difficulty:
Number of Creatures:
Number of Headshots:
Scene Score:
Running Score: 21480/22600
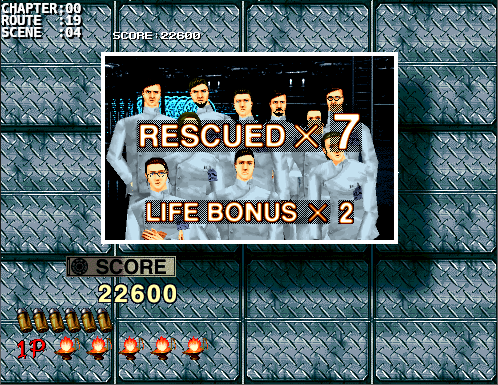
Bonus: LIFE BONUS x 2
Notes:
Good job. You made it to the end of the first chapter. At this point you should have your lives maxed out and can now start earning bonus points for life ups. If your score is over 21000 then you're in good shape to reach 100,000 points. During my 110k run I was able to reach 22020. The highest I've ever scored was 22400 back in 2003 but this was on a machine that started with 4 lives and 5 Max so I was able to grab an extra Max Lives Bonus which you normally can't do on standard settings so technically it was a 22100 score.
Now onto the second chapter.
The Second ChapterRevenge |
Stage Gallery