“This is as far as you go, I’ll finish you here!”
With revenge on Dr. Curien in mind, Rogan and G proceed further into the mansion filled with atrocious creatures. The story truly begins when the agents fight against a slither monster that will not allow them to enter into the deepest part of the mansion in order to achieve Rogan’s personal grudge.
Creatures

Sam 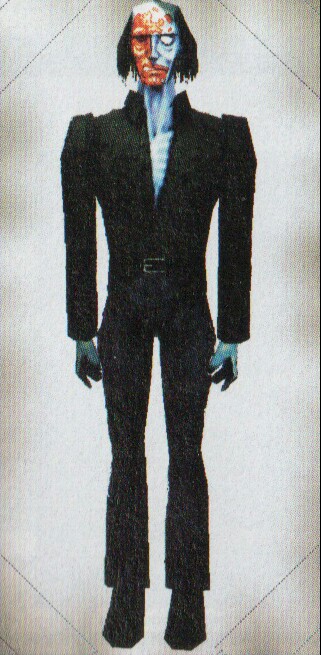
Nail 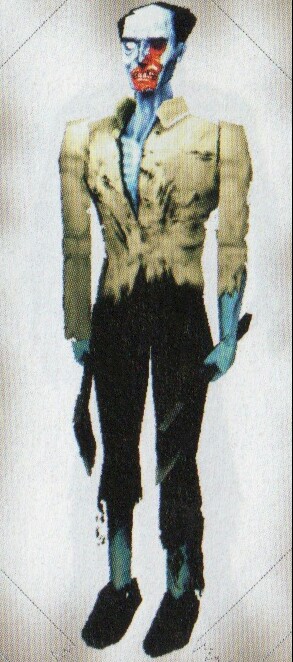
Cyril 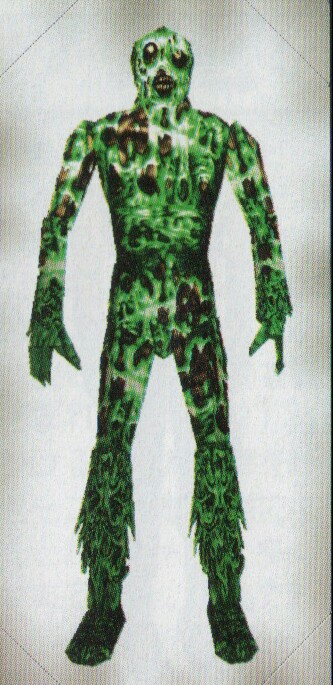
Ebitan-a 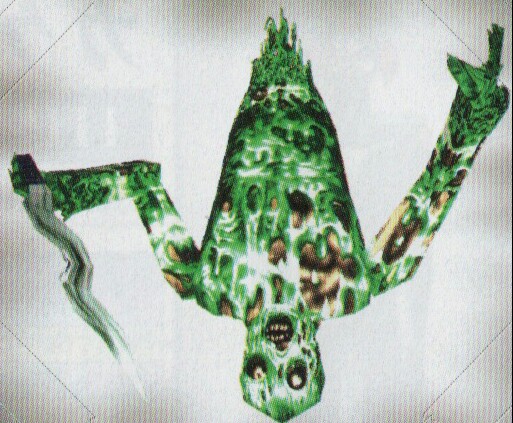
Ebitan-b 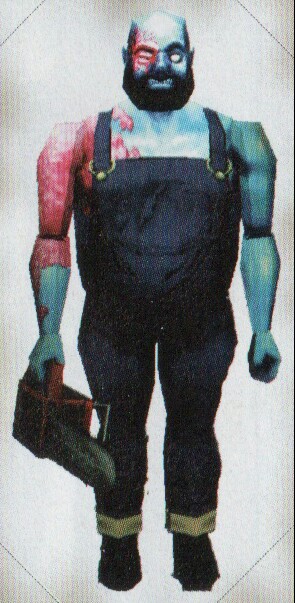
Samson 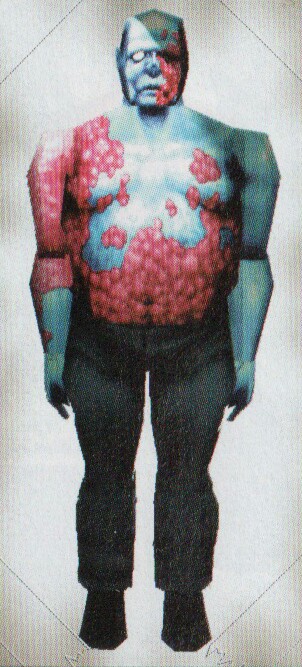
Bentley 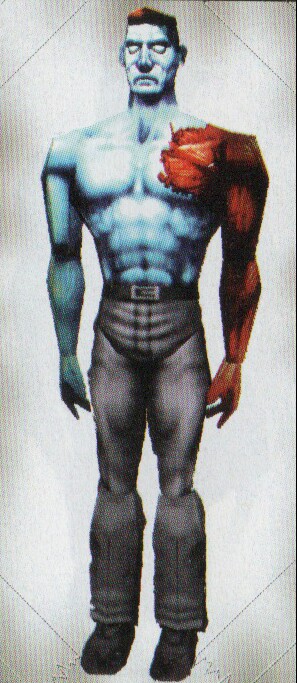
Simon 
Gilmore 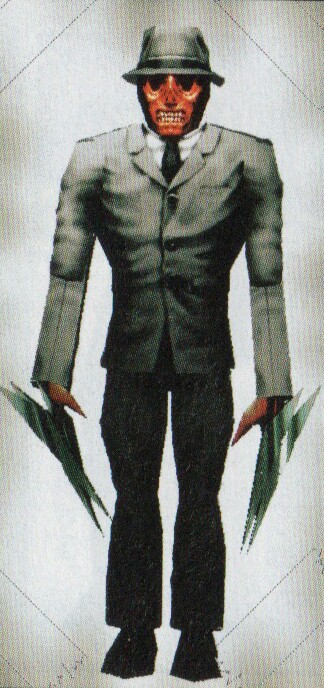
Rubin 
Drake 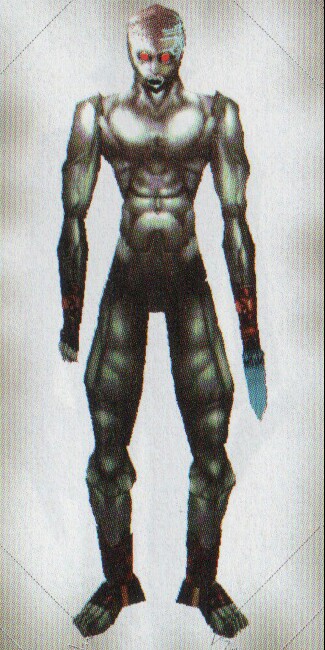
Barrer 
Devilon
Boss: HangedMan type 041
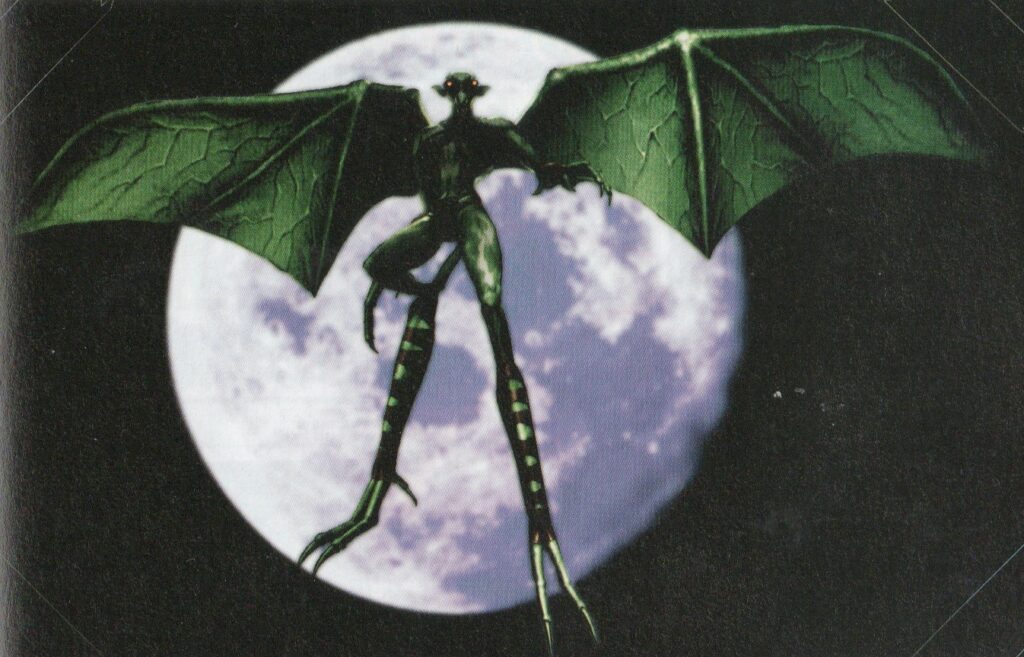
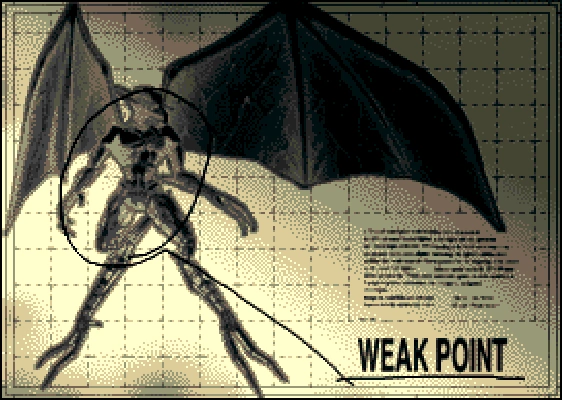
HP:800 Weakness: The Body
Dr. Curien’s imaginative use of the Bioreactor seems to know no bounds. The Hangedman is thought to be a unique bat/human hybrid as evidence by its wingspan, nocturnal dwelling and hyper sonic navigational abilities. AMS Intelligence Division have observed the Hangedman during night flights and noted a “cloud of vampire bats” shrouding this monster. Its weak point is the whole body other than the wings, but even if you play alone, you can not cancel the attack unless you fire several shots. Like normal enemies, you can get high points by shooting its head.
High Score Guide
| Introduction | The First Chapter Tragedy |
The Second Chapter Revenge |
The Third Chapter Truth |
The Final Chapter The house of the dead |
Alternate High Scoring Paths |
Special Thanks |
|---|---|---|---|---|---|---|
| AIM | DESCRIPTION | |||||
 |
Scene: [01:00:02]
Difficulty: C
Number of Creatures: 1
Number of Headshots: 2/2
Scene Score:      320/  320
Running Score:  21800/22920
Bonus:

Notes:
Just as the scene begins a Bentley will throw an oil drum right at you.  Play it safe by taking 4 shots to the oil drum then 2 shots to the head.  Do note that its head will be a bit lower if it starts to run at you.
|
 |
Scene: [01:00:03]
Difficulty: C
Number of Creatures: 1
Number of Headshots: 1/1
Scene Score:      200/  200
Running Score:  22000/23120
Bonus:

Notes:
Nothing fancy here.
|
 |
Scene: [01:00:04]
Difficulty: B
Number of Creatures: 1
Number of Headshots: 2/2
Scene Score:      320/  320
Running Score:  22320/23440
Bonus:

Notes:
Take note of which arm Cyril attacks with and shoot it quickly.  While stunned, you'll be able to get a couple of quick shots to the head.
|
 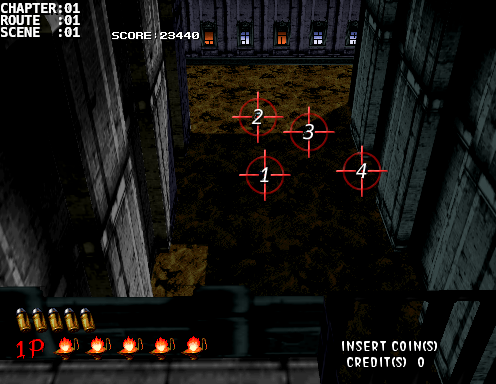 |
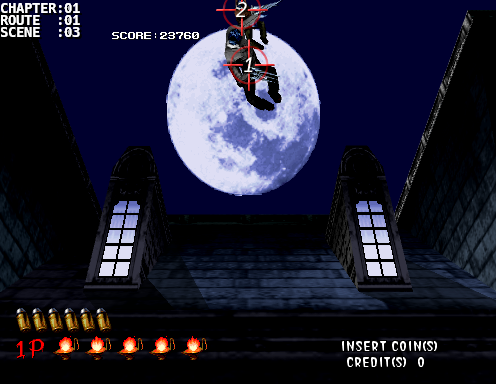
Scene: [01:01:01]
Difficulty: A
Number of Creatures: 4
Number of Headshots: 0/0
Scene Score:        0/  320
Running Score:  22320/23760
Bonus:

Notes:
As you pace over the bridge you'll see an elevator arrow to the right of the double doors.  Shoot it an odd number of times, preferably once, so that you take the route going down.  If you missed it here then you'll have one quick shot at it again after a couple of scenes.


As you turn left you'll see 4 creatures off in the distance.  No headshots for these so do your best to grab any of them.  I tend to only aim for the ones labeled [1] and [3] with two shots each but it's definitely possible to get all four.
|
 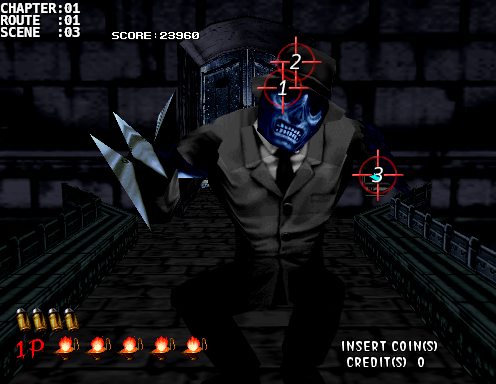 |
Scene: [01:01:03]
Difficulty: C
Number of Creatures: 2
Number of Headshots: 2/2
Scene Score:      400/  400
Running Score:  22720/24160
Bonus:

Notes:
You'll face the double doors again and two Rubins will fall from the sky.  Shoot the first one anywhere but the head and then take out the second one with a headshot mid-air.  Once the first Rubin lands it'll either do a backflip or it'll charge at you.  If it does a backflip then wait until it does a complete flip and then tag it while its head is facing down.  If it charges at you then wait until it leaps and then take a couple shots at the upper part of the screen [1] or [2] to guarantee a headshot.  This is will be a common strat for a lot of the creatures later on in the game.
|
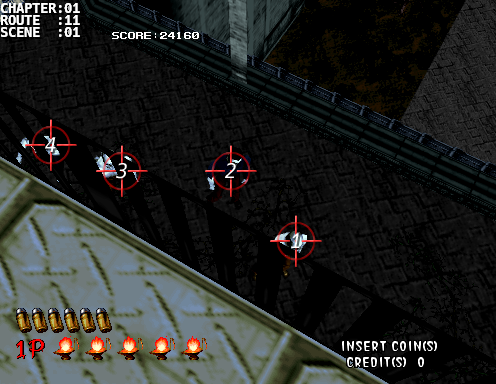 |
Scene: [01:11:01]
Difficulty: B
Number of Creatures: 4
Number of Headshots: 0/0
Scene Score:      240/  320
Running Score:  22960/24480
Bonus:

Notes:
As you turn right you'll see 4 more creatures down below.  No headshots for these either but they're in reasonable range to tag 3 or more.
|
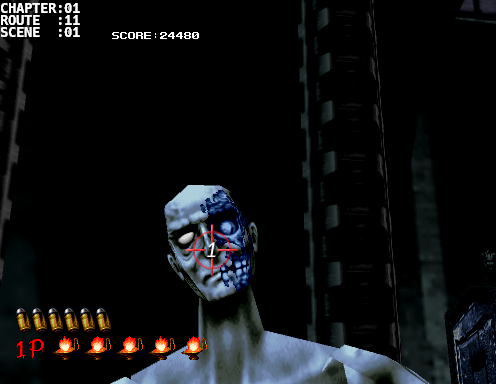 |
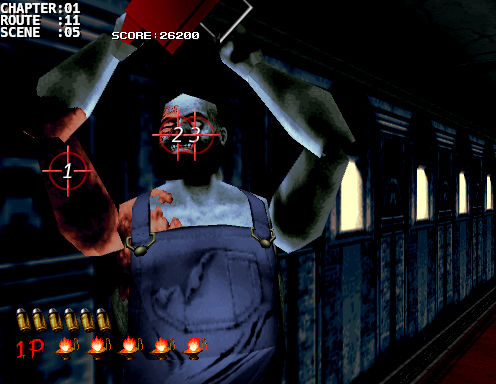
Scene: [01:11:01]
Difficulty: C
Number of Creatures: 1
Number of Headshots: 1/1
Scene Score:      200/  200
Running Score:  23160/24680
Bonus:

Notes:
One will pop up as you turn back to your left.  Sometimes I forget about this guy because I'm worried about the next scene.
|
 |
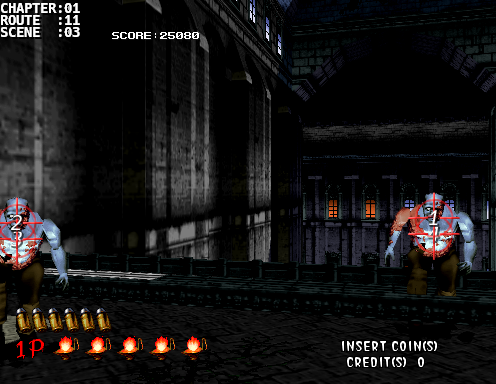
Scene: [01:11:02]
Difficulty: C
Number of Creatures: 2
Number of Headshots: 2/2
Scene Score:      400/  400
Running Score:  23560/25080
Bonus:

Notes:
Nail (the center one) will attack fast in this scene so just as you land and turn right aim towards the center and give it a good 4 shots or more for good measure even though it only takes one (trust me, you don't want to take an early hit) Then take out Sam with one more shot.
|
 |
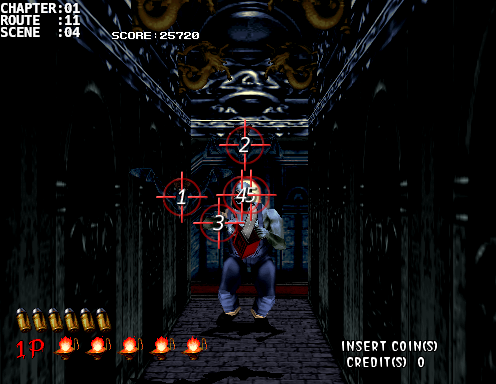
Scene: [01:11:03]
Difficulty: C
Number of Creatures: 2
Number of Headshots: 4/4
Scene Score:      640/  640
Running Score:  24200/25720
Bonus:

Notes:
Bentley's will always lean forward while they run so don't aim above their shoulders.  The proper location is shoulder height for the first shot and then above the shoulders for the second shot while they're recovering.  I tend to take a quick shot on the right one first, then 2 shots on the left one, and then back to the right for the final shot.
|
 |
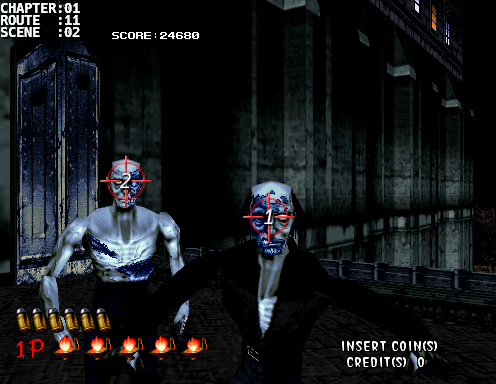
Scene: [01:11:04]
Difficulty: C
Number of Creatures: 3
Number of Headshots: 2/2
Scene Score:      480/  480
Running Score:  24680/26200
Bonus:

Notes:
As you make your way in two bats will charge at you straight away [1] and [2].  Next deal with Samson with the typical AHH strat.
|
 |
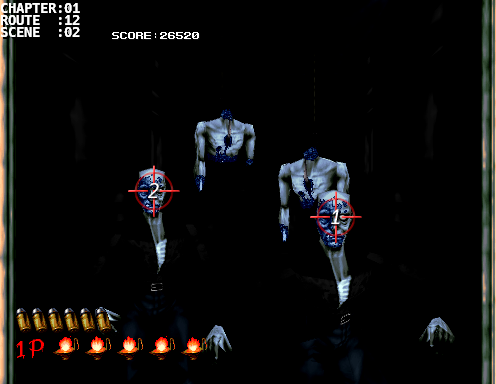
Scene: [01:11:05]
Difficulty: C
Number of Creatures: 1
Number of Headshots: 2/2
Scene Score:      320/  320
Running Score:  25000/26520
Bonus:

Notes:
When you turn right this Samson will do a fake attack for a split second (to block any quick shots) and then pull its arms up again momentarily.  Use this small opportunity to take the AHH.
|
 |
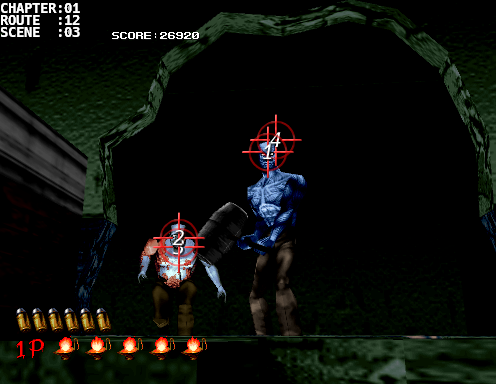
Scene: [01:12:02]
Difficulty: C
Number of Creatures: 2
Number of Headshots: 2/2
Scene Score:      400/  400
Running Score:  25400/26920
Bonus:

Notes:
As you enter the kitchen you'll turn left and the walk-in fridge door will burst open with two Nail's storming out craving fresh flesh as they've already eaten up both of the hanging Sam's (which btw don't give extra points).  Take out the right one then left, one shot each.
|
 |
Scene: [01:12:03]
Difficulty: C
Number of Creatures: 2
Number of Headshots: 2/4
Scene Score:      400/  640
Running Score:  25800/27560
Bonus:

Notes:
As you make your way out of the kitchen the wall to your left will come crashing down and send you flying to the ground.  From this vantage point you'll see a Gilmore (the fellow that has a huge sledgehammer resembling Usopp's 5t hammer) and a Bentley in the back.  I like to take one shot on Gilmore first, then take out Bentley, then a final shot on Gilmore.  Otherwise, take out Gilmore first with two shots, then Bentley.
|
 |
Scene: [01:12:04]
Difficulty: B
Number of Creatures: 2
Number of Headshots: 2/2
Scene Score:     1100/ 1100
Running Score:  26900/28660
Bonus: 400 (Researcher) +
       300 (Max Life Bonus)

Notes:
You'll need to get through this scene quickly otherwise the researcher will get attacked by a Nail in the back.  As the door opens, quickly take care of the one in your face (take more than one shot if you have to just to be safe) and then take out the one creeping up on the lady researcher on the table.
|
 |
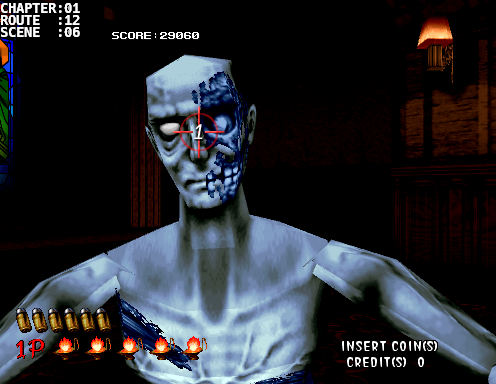
Scene: [01:12:05]
Difficulty: B
Number of Creatures: 2
Number of Headshots: 2/2
Scene Score:      400/  400
Running Score:  27300/29060
Bonus:

Notes:
This scene can get hectic just like all the previous times when where there are a pair of Cyril's.  Take out the left one first then the right.  A heed of caution, if you miss the kills then be ready for a hatchet frenzy. Take note of which hand the hatchets will be thrwon from (because they'll be coming in hot) and gun those down before trying at the headshots again.
|
 |
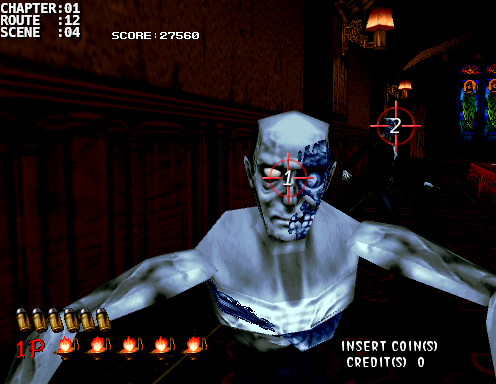
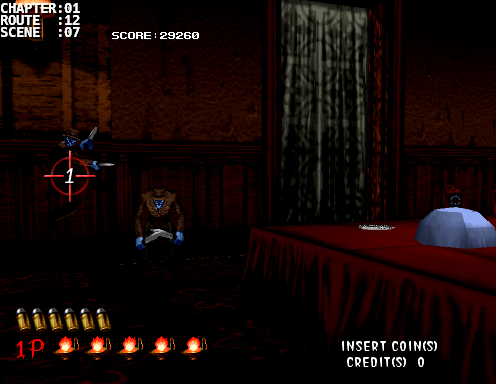
Scene: [01:12:06]
Difficulty: C
Number of Creatures: 1
Number of Headshots: 1/1
Scene Score:      200/  200
Running Score:  27500/29260
Bonus:

Notes:
An easy 1 shotter.
|
 Dagger Attack 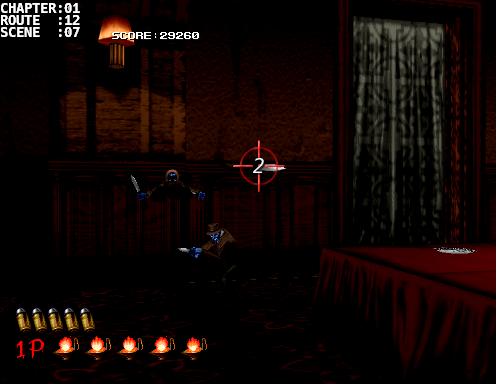 Backflip 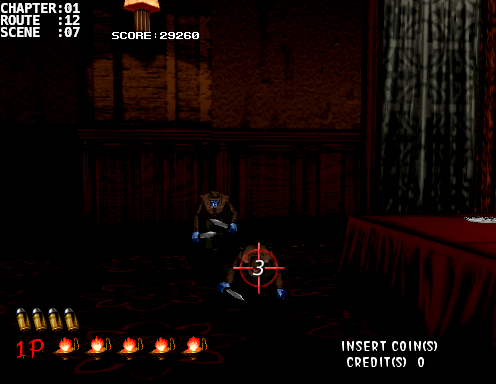 Charge Attack 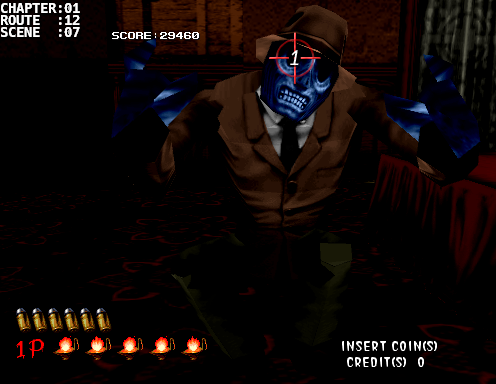 |
Scene: [01:12:07]
Difficulty: C
Number of Creatures: 2
Number of Headshots: 2/2
Scene Score:      400/  400
Running Score:  27900/29660
Bonus:

Notes:
Shortly after that you'll see 2 Drakes hanging upside down from the ceiling.  These guys are a bit different than Rubin as they will throw daggers at you.  Also, don't shoot their head off until after they land because you won't guarantee yourself the 80 kill points if you take the headshots early and then take too long to kill them off.

As they land they will head left and passed the table.  The one on the left will most likely jump vertically to throw a dagger at you.  Land a single shot on it before it throws the dagger (it doesn't have to be a headshot because a headshot will behead it but not kill it)  This will offset their attack patterns so you don't get bombarded.  The one to the right will then do 1 of 3 things:
- A dagger attack like the left one
- A backflip
- A charge attack (this usually occurs when both daggers have been thrown)

If it does a backflip then aim at its head when it lands for an easy headshot.  If it does a dagger attack then shoot the dagger before it hits you and then go for the headshot or lastly wait until it charges at you and then aim towards the upper portion of the screen for an easy headshot.
|
 |
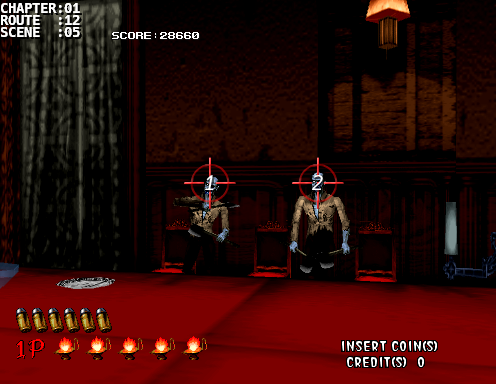
Scene: [01:12:08]
Difficulty: C
Number of Creatures: 1
Number of Headshots: 1/1
Scene Score: 200/ 200
Running Score: 28100/29860
Bonus:
Notes:
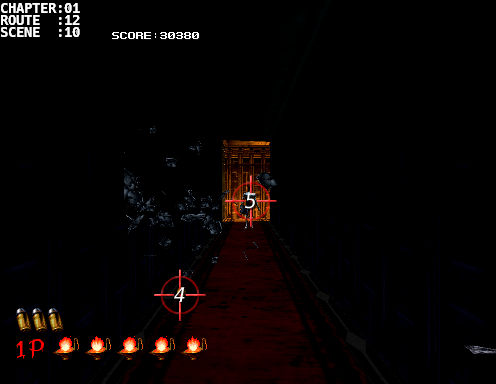
As you enter the door an Ebitan will hang down from the ceiling. Take one shot to the body or arm to block its initial attack [1] then give it one more shot to the head [2].
|
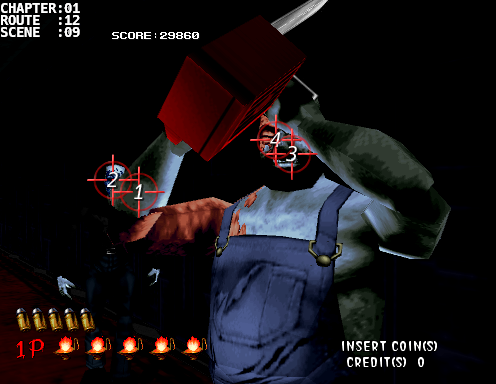 |
Scene: [01:12:09]
Difficulty: C
Number of Creatures: 2
Number of Headshots: 3/3
Scene Score:      520/  520
Running Score:  28620/30380
Bonus:

Notes:
Do an AHH for Samson but after the arm shot [1] and before the two headshots [3][4] take out the Nail towards the back left [2].  Do this strat will give a bit more time for the next scene.
|
  |
Scene: [01:12:10]
Difficulty: C
Number of Creatures: 1
Number of Headshots: 0/0
Scene Score:      280/  280
Running Score:  28900/30660
Bonus:

Notes:
Another one of Dr. Curien's beloved coins is hidden in the jars to the left.  Take three shots to shatter the vases, which will reveal the coin, and one final shot to collect it. Afterwards, take out the creature in the back.  No headshot on this one so aim for its back.
|
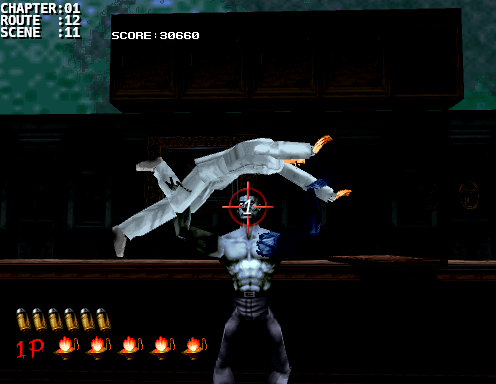 |
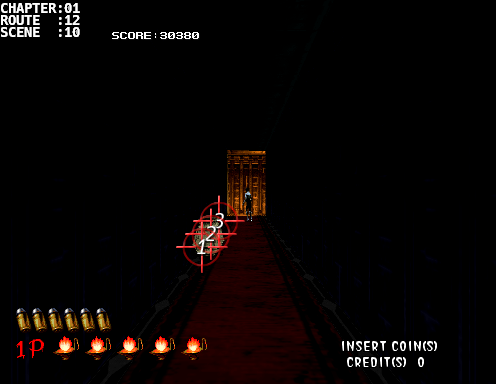
Scene: [01:12:11]
Difficulty: C
Number of Creatures: 1
Number of Headshots: 1/1
Scene Score:      900/  900
Running Score:  29800/31560
Bonus: 400 (Researcher) +
       300 (Max Life Bonus)

Notes:
This can be a bit scary if you don't trust your aim or if the guns aren't calibrated well.  Once shot to the face is all you need.  If you're not confident enough then 3 quick shots to the chest will do.  Just don't take your time because you don't want the researcher to be thrown at you and lose the bonus room, a health torch, and -200 damage points.
|
  |
Scene: [01:13:02]
Difficulty: C
Number of Creatures: 1
Number of Headshots: 1/1
Scene Score:      200/  200
Running Score:  30000/31760
Bonus:

Notes:
A Rubin will fall from above.  Tag it with one shot and let it land.  Then when it comes charging at you, tag it once more in the face when it leaps at you.
|
 |
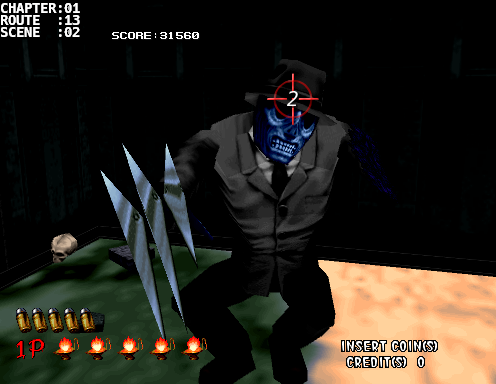
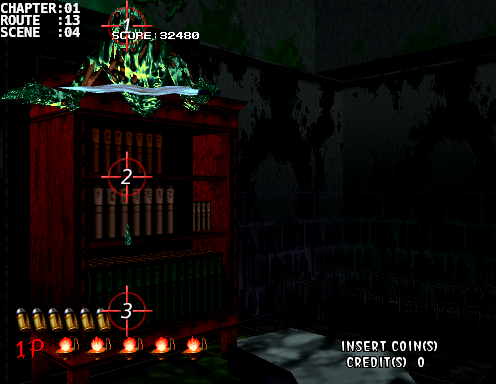
Scene: [01:13:03]
Difficulty: C
Number of Creatures: 3
Number of Headshots: 4/4
Scene Score:      720/  720
Running Score:  30720/32480
Bonus:

Notes:
An easy combo.  Left one once, Right one once, Twice down the middle.

Don't rest easy yet as the next part will is very important and goes by really quick.
|
 |
Scene: [01:13:04]
Difficulty: C
Number of Creatures: 0
Number of Headshots: 0/3
Scene Score:        0/  360
Running Score:  30720/32840
Bonus:

Notes:
You'll face the bookshelf but pause a bit because of a drop of slime from above.  That's your cue to start shooting.  You can get a total of 3 headshots on this falling Ebitan (no kill points though).  Don't relax yet as the next scene occurs straight away.
|
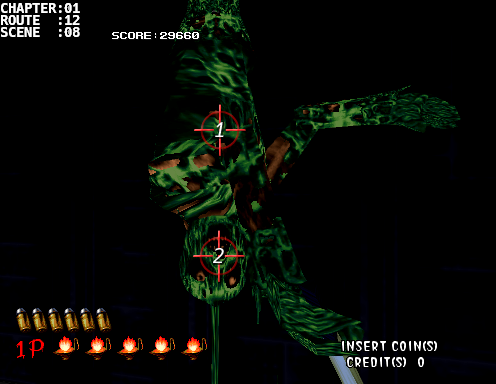
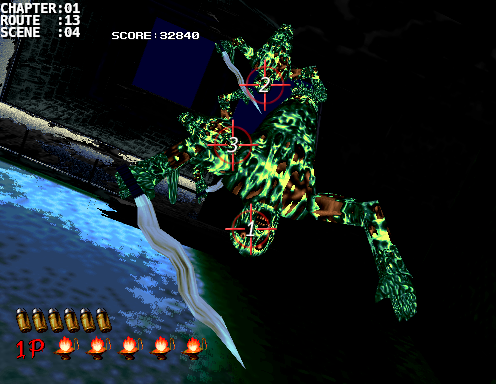 |
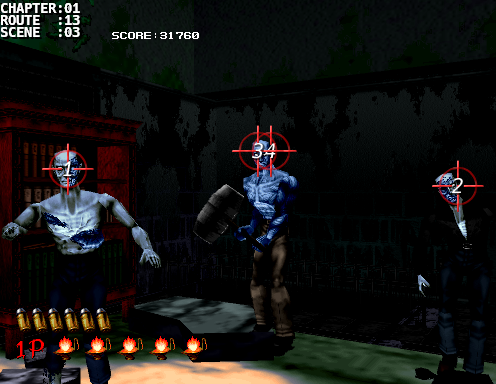
Scene: [01:13:04]
Difficulty: C
Number of Creatures: 3
Number of Headshots: 3/3
Scene Score:      840/  840
Running Score:  31560/33680
Bonus: 120 x 2

Notes:
You'll then look up to see 3 Ebitans.  The first 2 are very important [1] and [2].  They only take 1 headshot each but give you an extra headshot bonus for some odd reason.  The 3rd one just gives you a single headshot score though.  So 5 headshot points for the price of 3.  Not too bad.
|
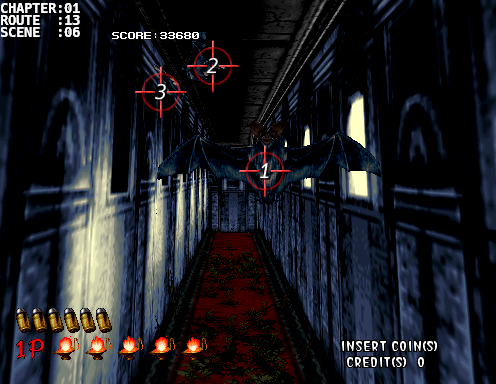 |
Scene: [01:13:06]
Difficulty: C
Number of Creatures: 3
Number of Headshots: 0/0
Scene Score:      240/  240
Running Score:  31800/33920
Bonus:

Notes:
As you kick the bookshelf down, like a boss, 3 bats will rush you. The first bat [1] will come almost immediately while bats [2] and [3] will swoop in a short time after.
|
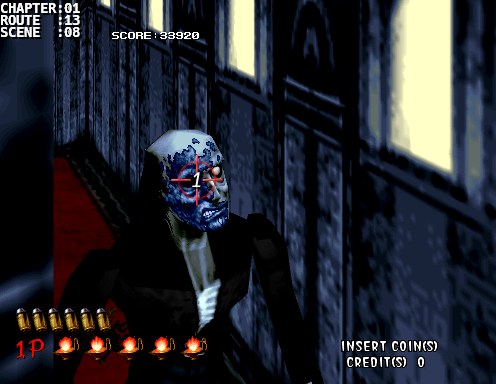 |
Scene: [01:13:08]
Difficulty: C
Number of Creatures: 1
Number of Headshots: 1/1
Scene Score:      200/  200
Running Score:  32000/34120
Bonus:

Notes:
The first turn around the corner will be clear but a Nail will await you around the second turn.
|
 |
Scene: [01:13:09]
Difficulty: C
Number of Creatures: 2
Number of Headshots: 2/2
Scene Score:      400/  400
Running Score:  32400/34520
Bonus:

Notes:
You'll turn the corner once more and then when you reach the top floor you'll look left and a pair of Cyrils will be staring at you.  Aim at [1] before you reach the scene and then adjust your shot for the left one first then the right (one shot each).  Again, if you miss the headshots be ready to shoot off the flying hatchets.
|
 |
Scene: [01:13:10]
Difficulty: A
Number of Creatures: 3
Number of Headshots: 0/0
Scene Score:      240/  240
Running Score:  32640/34760
Bonus:

Notes:
No headshots on this trio of creatures so take them out as soon as possible as the scene goes by fast.  Sometimes they will be standing straight up, other times they'll be a slouched over, and sometimes they'll be walking towards the right.
|
  |
Scene: [01:13:10]
Difficulty: C
Number of Creatures: 2
Number of Headshots: 3/3
Scene Score:      520/  520
Running Score:  33160/35280
Bonus:

Notes:
The Nail to the left will appear from off the screen so be ready.  Then once you move over to Samson do a HrAH combo for a couple of easy headshots.
|
 |
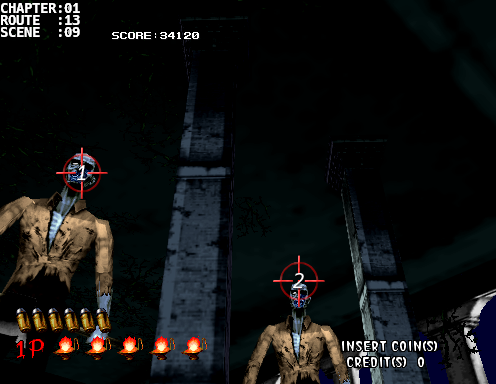
Scene: [01:04:01]
Difficulty: C
Number of Creatures: 4
Number of Headshots: 0/0
Scene Score:      320/  320
Running Score:  33480/35600
Bonus:

Notes:
4 shots in any order.
|
 |
Scene: [01:04:02]
Difficulty: C
Number of Creatures: 0
Number of Headshots: 0/0
Scene Score:      700/  700
Running Score:  34180/36300
Bonus: 400 (Researcher) +
       300 (Max Life Bonus)

Notes:
A researcher is hiding behind the bookshelf.  Save her by shooting the bottom of the shelf twice.
|
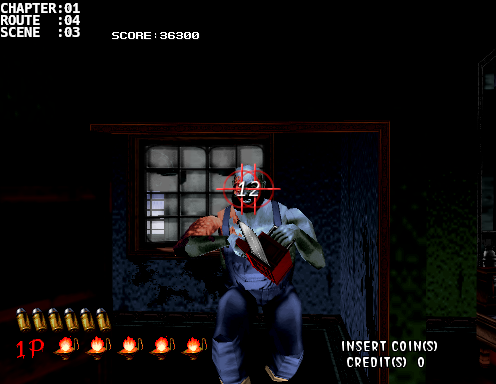 |
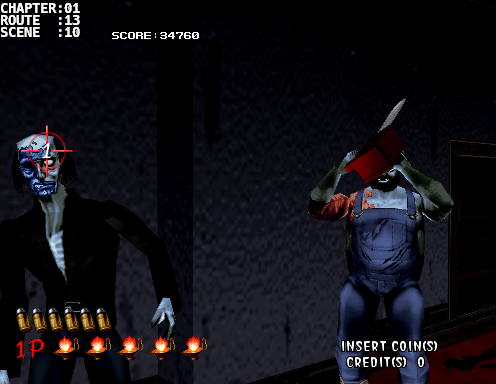
Scene: [01:04:03]
Difficulty: C
Number of Creatures: 1
Number of Headshots: 2/2
Scene Score:      320/  320
Running Score:  34500/36620
Bonus:

Notes:
Take a quick headshot just as the door opens, pause a bit to let it recover, then take another headshot.
|
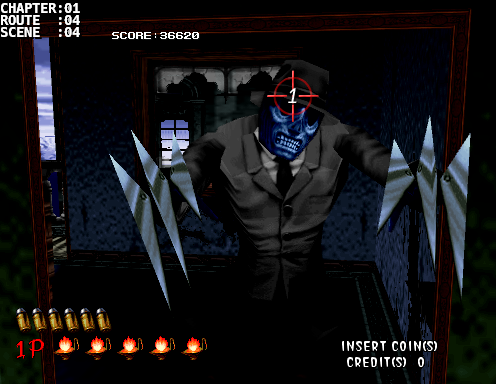 |
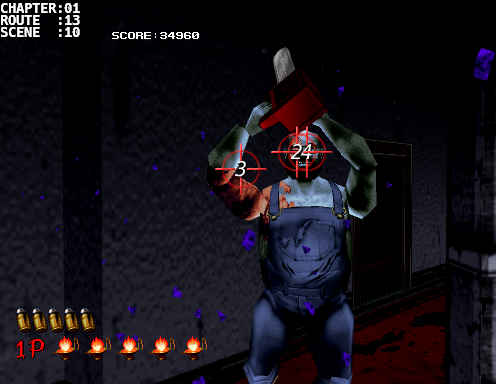
Scene: [01:04:04]
Difficulty: C
Number of Creatures: 1
Number of Headshots: 1/1
Scene Score:      200/  200
Running Score:  34700/36820
Bonus:

Notes:
Wait until the Rubin lands and take the quick headshot or wait until it charges at you and then take the aerial headshot.
|
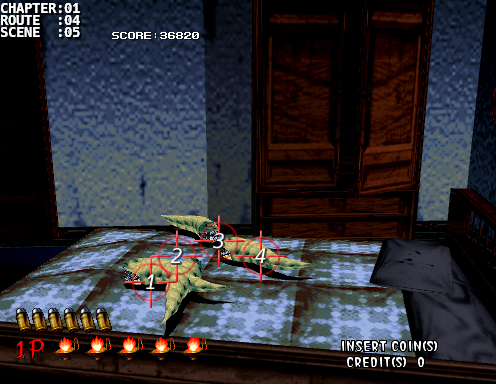 |
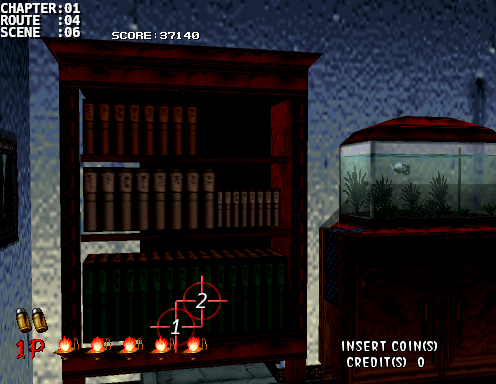
Scene: [01:04:05]
Difficulty: C
Number of Creatures: 4
Number of Headshots: 0/0
Scene Score:      320/  320
Running Score:  35020/37140
Bonus:

Notes:
4 more.
|
 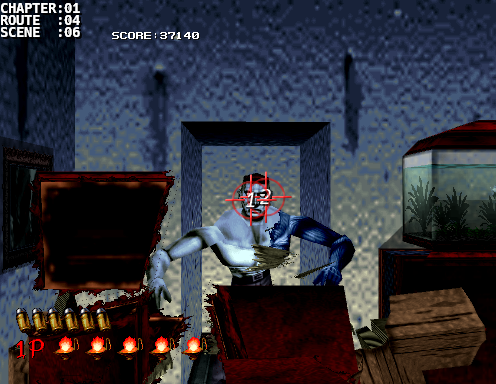 |
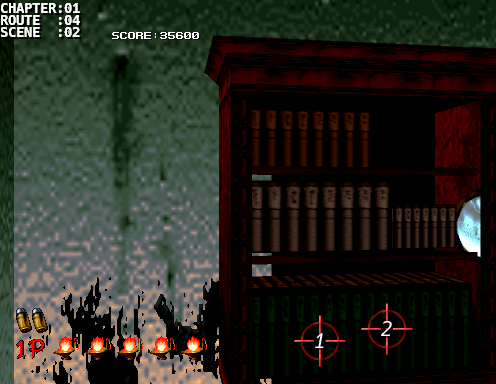
Scene: [01:04:06]
Difficulty: C
Number of Creatures: 1
Number of Headshots: 2/2
Scene Score:      320/  320
Running Score:  35340/37460
Bonus:

Notes:
Breaking down the bookshelf will reveal a Simon.  Take two quick headshots, no pause in between. (Come on let's jam.)
|
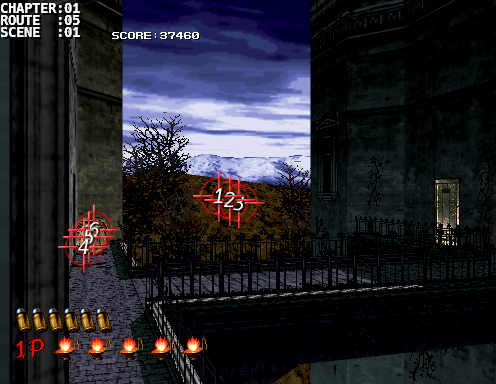 |
Scene: [01:05:01]
Difficulty: A
Number of Creatures: 1
Number of Headshots: 0/0
Scene Score:      280/  280
Running Score:  35620/37740
Bonus:

Notes:
As you leave the bedroom there'll be a creature off in the distance.  You only need 1 shot but I suggest to take at least 3 or more for good measure.  Then quickly shoot down the 2 jars and snag another coin.
|
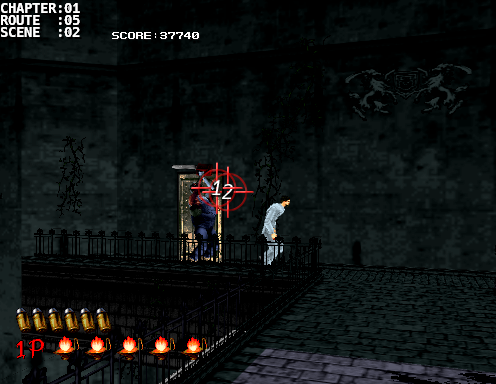 |
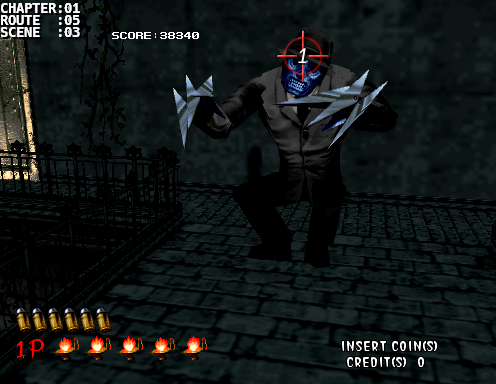
Scene: [01:05:02]
Difficulty: B
Number of Creatures: 1
Number of Headshots: 1/1
Scene Score:      600/  600
Running Score:  36220/38340
Bonus: 400 (Researcher)

Notes:
This scene used to give me a lot of trouble but it's actually quite easy.  Don't shoot at Samson.  Instead, wait for it to start walking and shoot a whole round in front of it and let it walk into your shot.  It's a lot easier for it to walk into your path than to chase after it.
|
 |
Scene: [01:05:03]
Difficulty: C
Number of Creatures: 1
Number of Headshots: 1/1
Scene Score:      200/  200
Running Score:  36420/38540
Bonus:

Notes:
Another Rubin will jump from the under the bridge to the left.  Don't shoot its head off in the air because, again, you aren't guaranteed 80 kill points.  Instead wait for it to land, as usual, and aim at [1] right away.  Most of the time it'll charge and you'll snag the headshot.  Other times it'll just wait on the bridge so just wait until it charges at you and then snag the headshot while its mid-air.
|
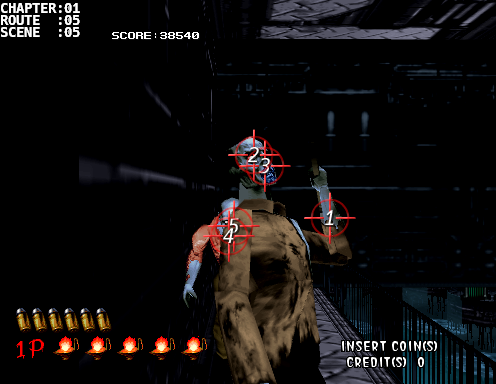 |
Scene: [01:05:05]
Difficulty: B
Number of Creatures: 2
Number of Headshots: 4/4
Scene Score:      640/  640
Running Score:  37060/39180
Bonus:

Notes:
When you enter the door you'll look left and a Cyril will be ready to attack you.  Take note of which arm it's going to attack with and shoot that off and tag it with a couple of headshots.  Then immediately go for the Bentley behind by shooting where Cyril's chest was, don't aim too high.
|
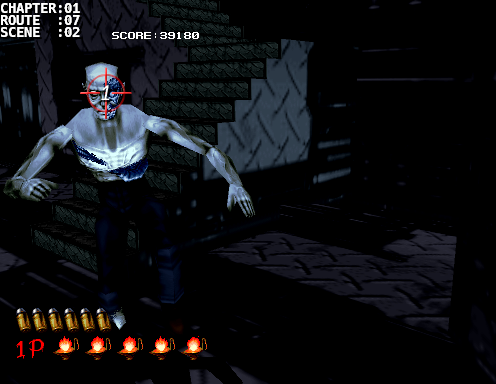 |
Scene: [01:07:02]
Difficulty: C
Number of Creatures: 1
Number of Headshots: 1/1
Scene Score:      200/  200
Running Score:  37260/39380
Bonus:

Notes:
Let the elevator point down so that we can grab more points.

Take one easy shot to take Sam out.
|
 |
Scene: [01:07:02]
Difficulty: C
Number of Creatures: 1
Number of Headshots: 2/2
Scene Score:      320/  320
Running Score:  37580/39700
Bonus:

Notes:
You'll then turn to the right.  Take two more on this Cyril.
|
 |
Scene: [01:07:02]
Difficulty: C
Number of Creatures: 1
Number of Headshots: 2/2
Scene Score:      320/  320
Running Score:  37900/40020
Bonus:

Notes:
You'll turn to the right once more and then take one shot, pause a bit, then take the second.

If done correctly, you'd be able to handle these 3 scenes without reloading.
|
 |
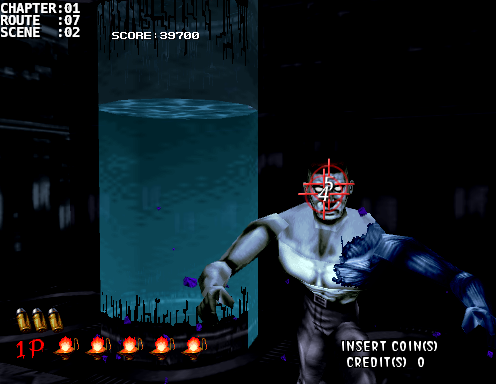
Scene: [01:07:03]
Difficulty: B
Number of Creatures: 1
Number of Headshots: 2/2
Scene Score: 320/ 320
Running Score: 38220/40340
Bonus:
Notes:
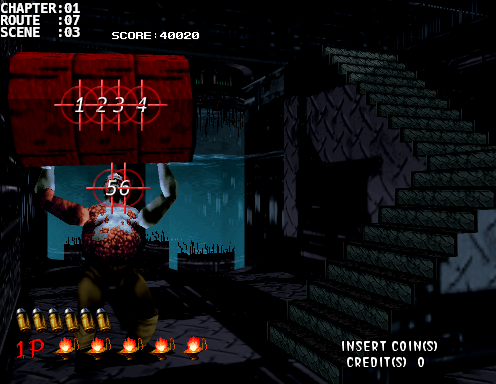
Take 4 quick shots to the oil drum then 2 shots to the face.
|
 |
Scene: [01:07:04]
Difficulty: C
Number of Creatures: 1
Number of Headshots: 2/2
Scene Score: 320/ 320
Running Score: 38540/40660
Bonus:
Notes:
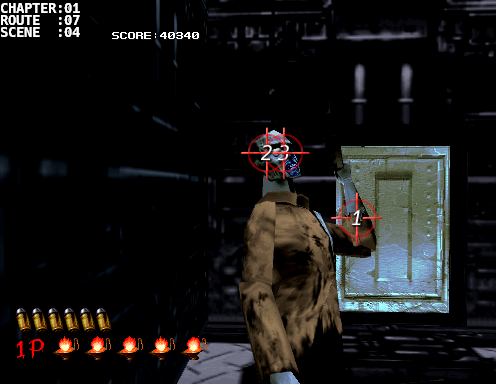
As you walk up the stairs Cyril will try to sneak an attack on you. Watch the arm as usual and then go for the double headshot.
|
 |
Scene: [01:08:02]
Difficulty: C
Number of Creatures: 1
Number of Headshots: 2/2
Scene Score: 320/ 320
Running Score: 38860/40980
Bonus:
Notes:
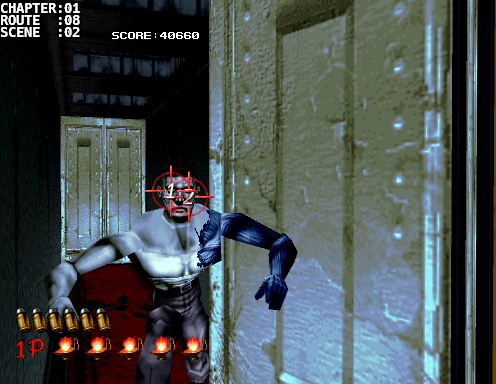
Next you'll enter a door and walk down a narrow hallway. As you open the door to the right, take a quick shot to stun the Simon then finish it off with another shot.
|
 |
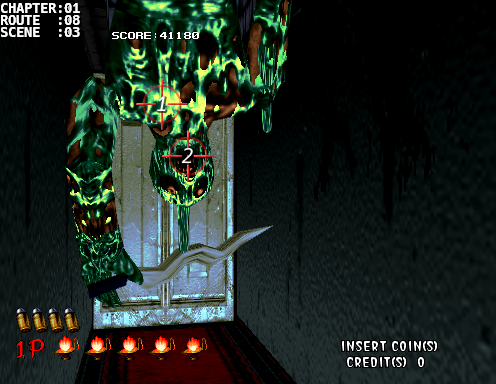
Scene: [01:08:03]
Difficulty: C
Number of Creatures: 1
Number of Headshots: 1/1
Scene Score: 200/ 200
Running Score: 39060/41180
Bonus:
Notes:
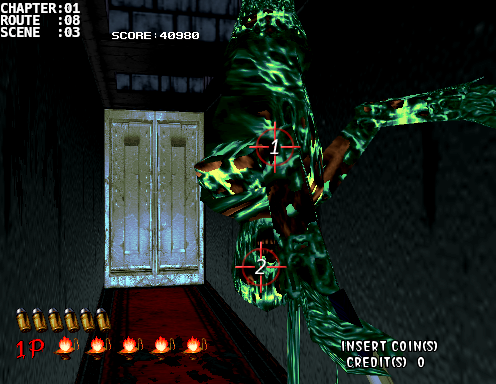
An Ebitan will hang down like last time so take one shot to block the attack and then a shot to the head.
|
 |
Scene: [01:08:03]
Difficulty: C
Number of Creatures: 1
Number of Headshots: 1/1
Scene Score:      200/  200
Running Score:  39260/41380
Bonus:

Notes:
Another one will drop down so repeat the same attack.
|
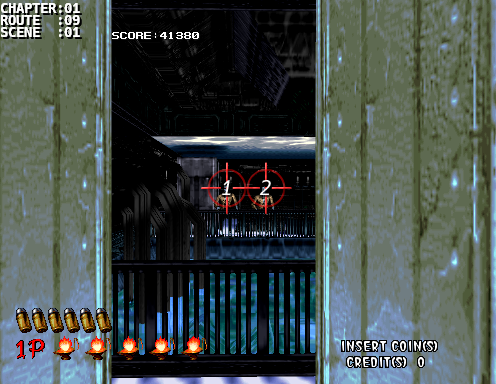 |
Scene: [01:09:01]
Difficulty: B
Number of Creatures: 2
Number of Headshots: 0/2
Scene Score:      160/  400
Running Score:  39420/41780
Bonus:

Notes:
Two Cyrils will be throwing hatchets from behind the rails in the back.  They take one shot each but will walk away if you don't kill them fast enough.
|
  |
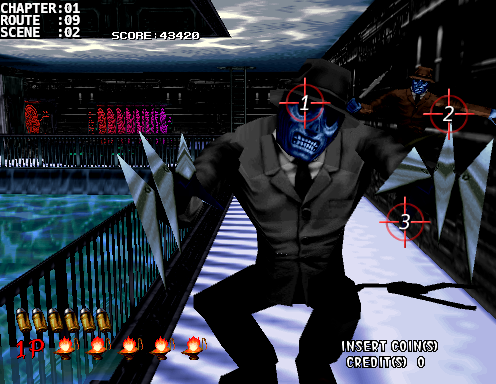
Scene: [01:09:01]
Difficulty: B
Number of Creatures: 2
Number of Headshots: 4/4
Scene Score:     1640/ 1640
Running Score:  41060/43420
Bonus:

Notes:
I give this scene a B difficultly because there's a chance that you can miss the gold frog.
Use 2 shots to kill the left Bentley then take one shot at the wooden barrel above the other Bentley [3], then the left wooden barrel behind it [4].  At this point take note whether a gold frog is leaping up and down at [4].  Next take out the Bentley with two shots.


Now if the gold frog is at [1] then shoot at it to pick up 1000 points. If it's not there then it's in the barrel in the corner [2][3] so shoot the barrel to break it and then pick up the gold frog there.
|
 |
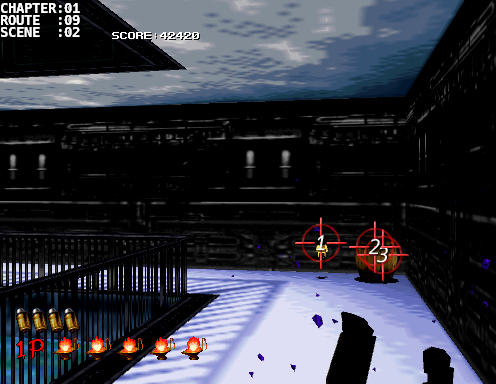
Scene: [01:09:02]
Difficulty: C
Number of Creatures: 2
Number of Headshots: 2/2
Scene Score:      400/  400
Running Score:  41460/43820
Bonus:

Notes:
A Drake and a Rubin will jump out of the liquid pool from the left.  The left one (Rubin) will almost always jump right at you so take a headshot while it's mid-air, do note that this headshot won't kill it.  At the same time check to see what the Drake is doing in the back (it's either going to throw a dagger or do a backflip).  If it's throwing a dagger then shoot it down right after the headshot on Rubin.  If it did a backflip then aim at [3] for the headshot.
|
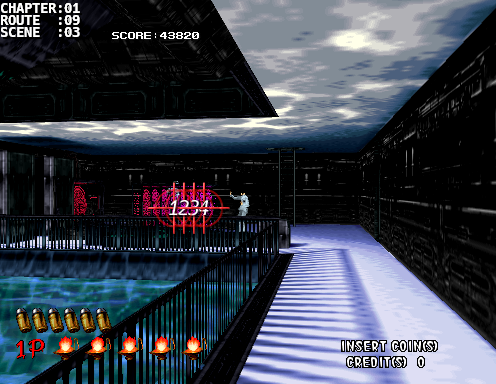  |
Scene: [01:09:03]
Difficulty: C
Number of Creatures: 1
Number of Headshots: 2/2
Scene Score:      720/  720
Running Score:  42180/44540
Bonus: 400 (Researcher)

Notes:
As you're walking towards the researcher shoot the glass screens in order to get a clear shot on the Simon that's making its way to the lady.


Once you get close enough, take two shots to take it down.
|
 |
Scene: [01:09:04]
Difficulty: C
Number of Creatures: 1
Number of Headshots: 1/1
Scene Score:      200/  200
Running Score:  42380/44740
Bonus:

Notes:
An easy 1 shotter.
|
 |
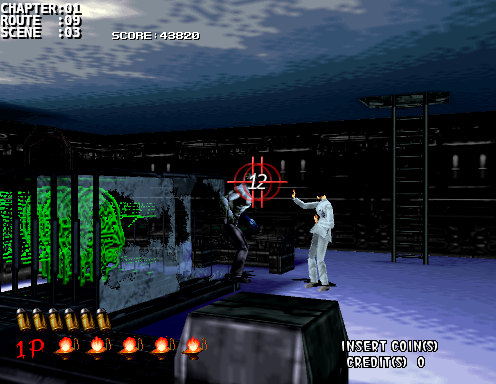
Scene: [01:09:05]
Difficulty: C
Number of Creatures: 1
Number of Headshots: 0/1
Scene Score:      480/  600
Running Score:  42860/45340
Bonus: 400 (Researcher)

Notes:
It's easy to miss the headshot here so aim at [1] and wait for it to enter your line of sight and take the shot.
|
Phase 1 - Bat Attack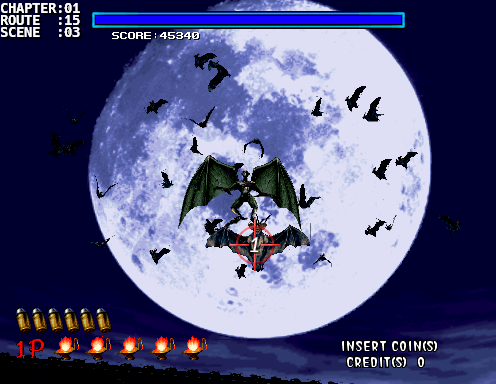 Phase 2 - 1st Attack 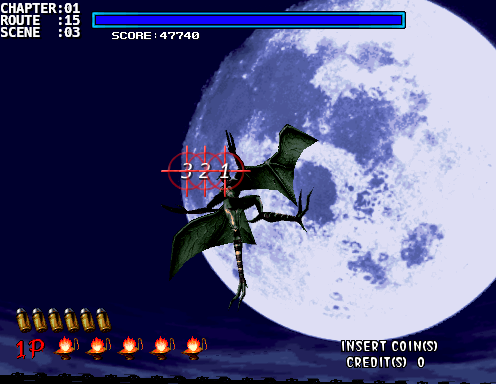 Phase 2 - 2nd Attack 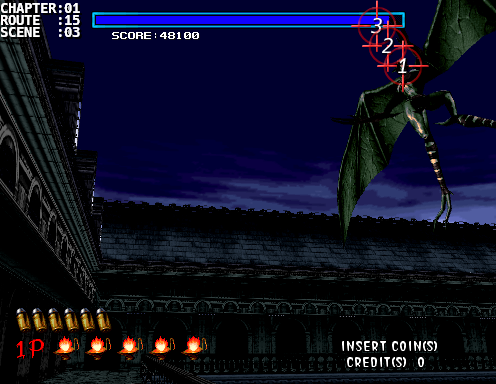 Phase 2 - 3rd Attack 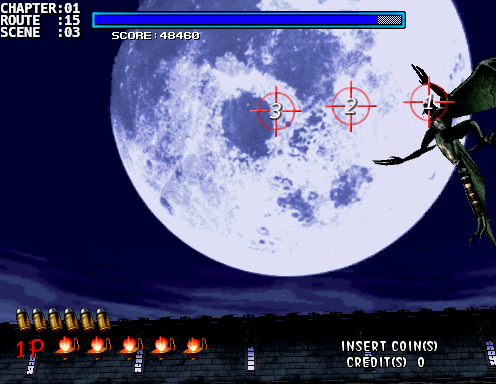 Phase 2 - 4th Attack 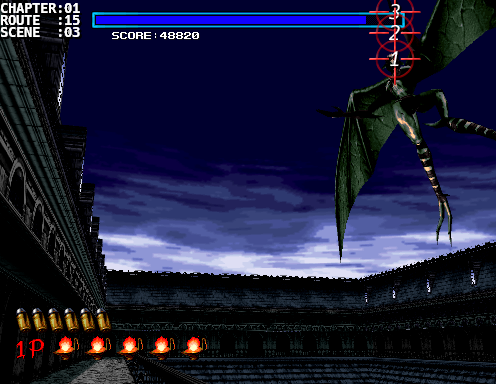 Phase 2 - 5th Attack 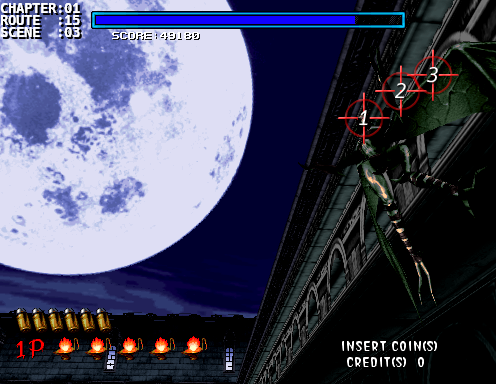 Phase 2 - Repetitive Attack 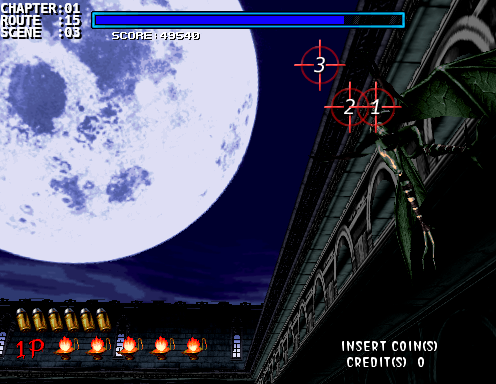 Phase 3 - 1st Attack 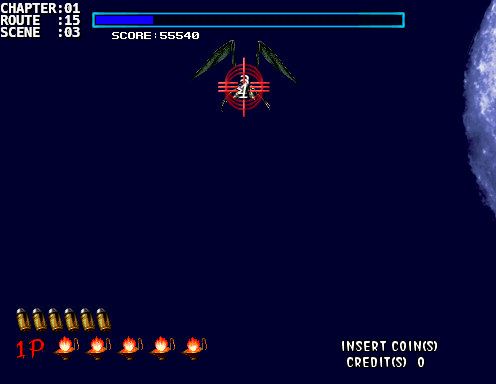 Phase 3 - 2nd Attack 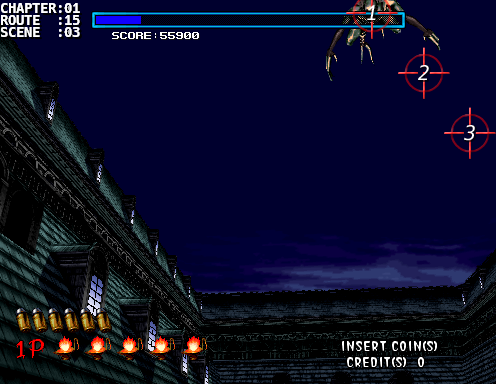 Phase 3 - 3rd Attack  Phase 3 - 4th Attack 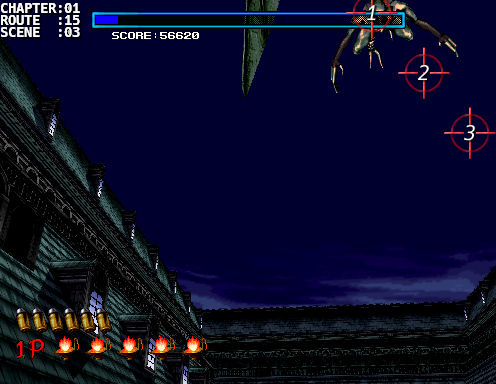 Phase 3 - 5th Attack  |
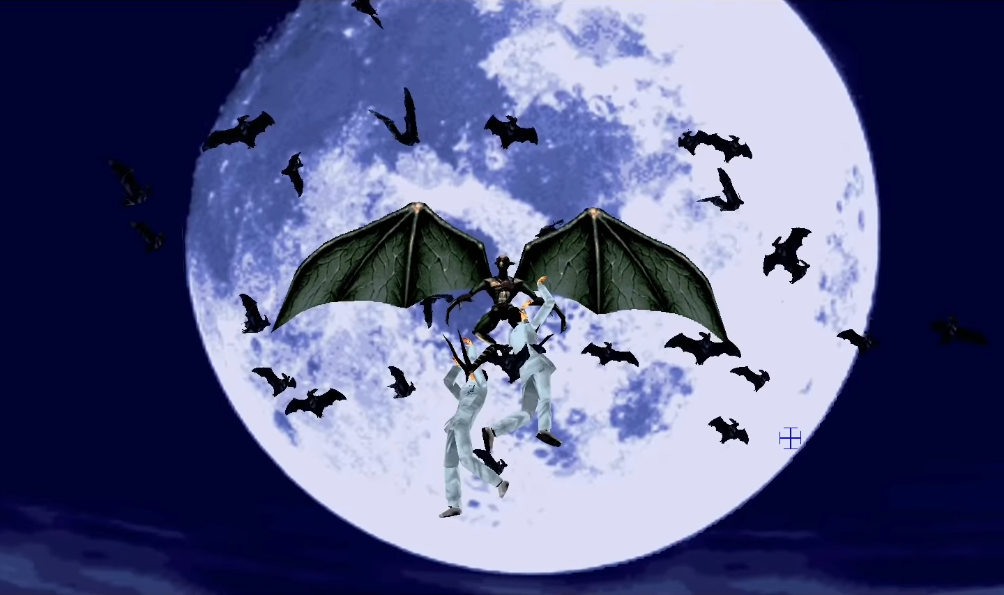
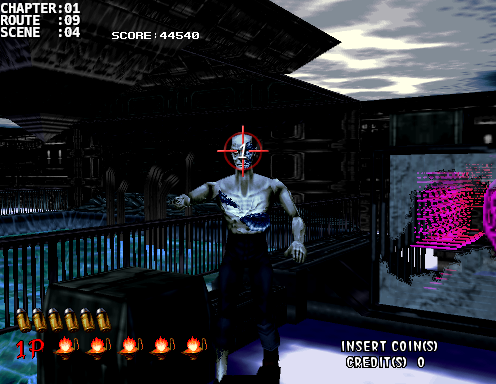
Scene: [01:15:03]
Difficulty: A
Number of Creatures: 31
Number of Headshots: 42/80
Scene Score:     8940/13500
Running Score:  51800/58840
Bonus: 1500 (Defeating Hangedman)

Notes:
Overall, Hangedman isn't a hard boss.  It only needs 80 hits to take it down.  The hard part is racking up headshot points to boost your score.  Yes, all headshots to Hangedman "while it's active" counts for headshot points. The bats will also give points so we'll take down all of them to increase our score.

Phase 1 - Bat Attack:

There are 30 bats that come in waves starting with 1 and moving up to 4 then it repeats starting at 1 for a total of 12 waves.  Be on the look out for a bat hiding behind Hangedman's wings.  Sometimes they pop up so late that it can startle you a bit especially during a 4 bat wave.

Some people who trust their aim will try to snipe some headshots on Hangedman during this phase.  If you're confident then, by all means, go for it.  I choose not to as it breaks my rhythm during the fight.

After you defeat all 30 bats, Hangedman will start swoop in and slash at you wiht different attack patterns.  During these attacks it take 3 shots to back it off.  [1] represents the start point of Hangedman's head and [3] is the end point before the attack.  The path inbetween is labelled as [2].  Use up all your shots during each attack to guarantee damage.  Getting 3 headshots consistently is very difficult but try your best without taking any damage.

Phase 2 - 1st Attack:
Move horizontally to the left very slightly.

Phase 2 - 2nd Attack:
Move up and diagonally to the left, finishing your last shot in the health bar.


Phase 2 - 3rd Attack:
This is a wide attack so move horizontally to the left with your last shot towards the middle of the screen.


Phase 2 - 4th Attack:
This one goes vertically up the last shot almost outside of the screen.  Don't wait too long on this one because it head will actually go offscreen.


Phase 2 - 5th Attack:
It stays to the right of the screen this time and moves to up-right very slightly.


Phase 2 - Repetitive Attack:
The remaining attack pattern at this point will be the same for the next 50 shots (16 waves of 3 shots + 1 wave of 2 shots).  Aim in an arc diagonally upwards to the left, make sure your final shot is at [3] to guarantee a headshot.


Phase 3 - 1st Attack:
Fairly easy.  It'll dive down from the top of the scren, you want it to get close so you can get a good shot off but just don't wait too long.


Phase 3 - 2nd Attack:
It'll come in with a full head of steam from the top left.  Again, don't wait too long otherwise its head will be offscreen and you might even take damage.


Phase 3 - 3rd Attack:
Just like the 1st attack except from the bottom.


Phase 3 - 4th Attack:
A repeat of the 2nd attack.


Phase 3 - 5th Attack:
A repeat of the 1st attack.
|
 |
Scene: [01:15:04]
Difficulty:
Number of Creatures:
Number of Headshots:
Scene Score:
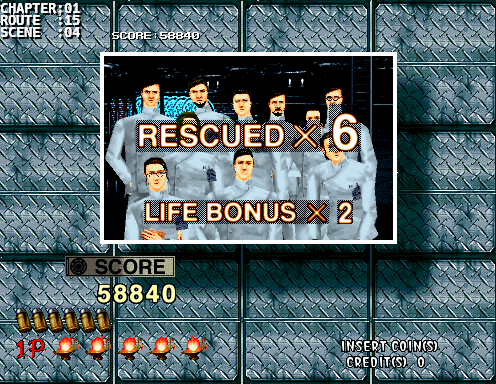
Running Score: 51800/58840
Bonus: LIFE BONUS x 2
Notes:
Breathe. You made it passed the 2nd chapter. If you're around 52000 then you're in good shape. I only scored 54620 during my 110k run, I obviously still need to work on the Hangedman battles because I could have had a much higher top score if I only practiced a bit more. My highest score was again back in 2003 with a score of 55580 which is 8 headshots more than my 110k run. But even with a decent score, the Third Chapter will either make it or break it for you. Off we go.
The Third ChapterTruth |
Stage Gallery